How to assemble the TBXS116D
Tools required: An Allen key (included), a Phillips (star) screwdriver, a hammer (optional)
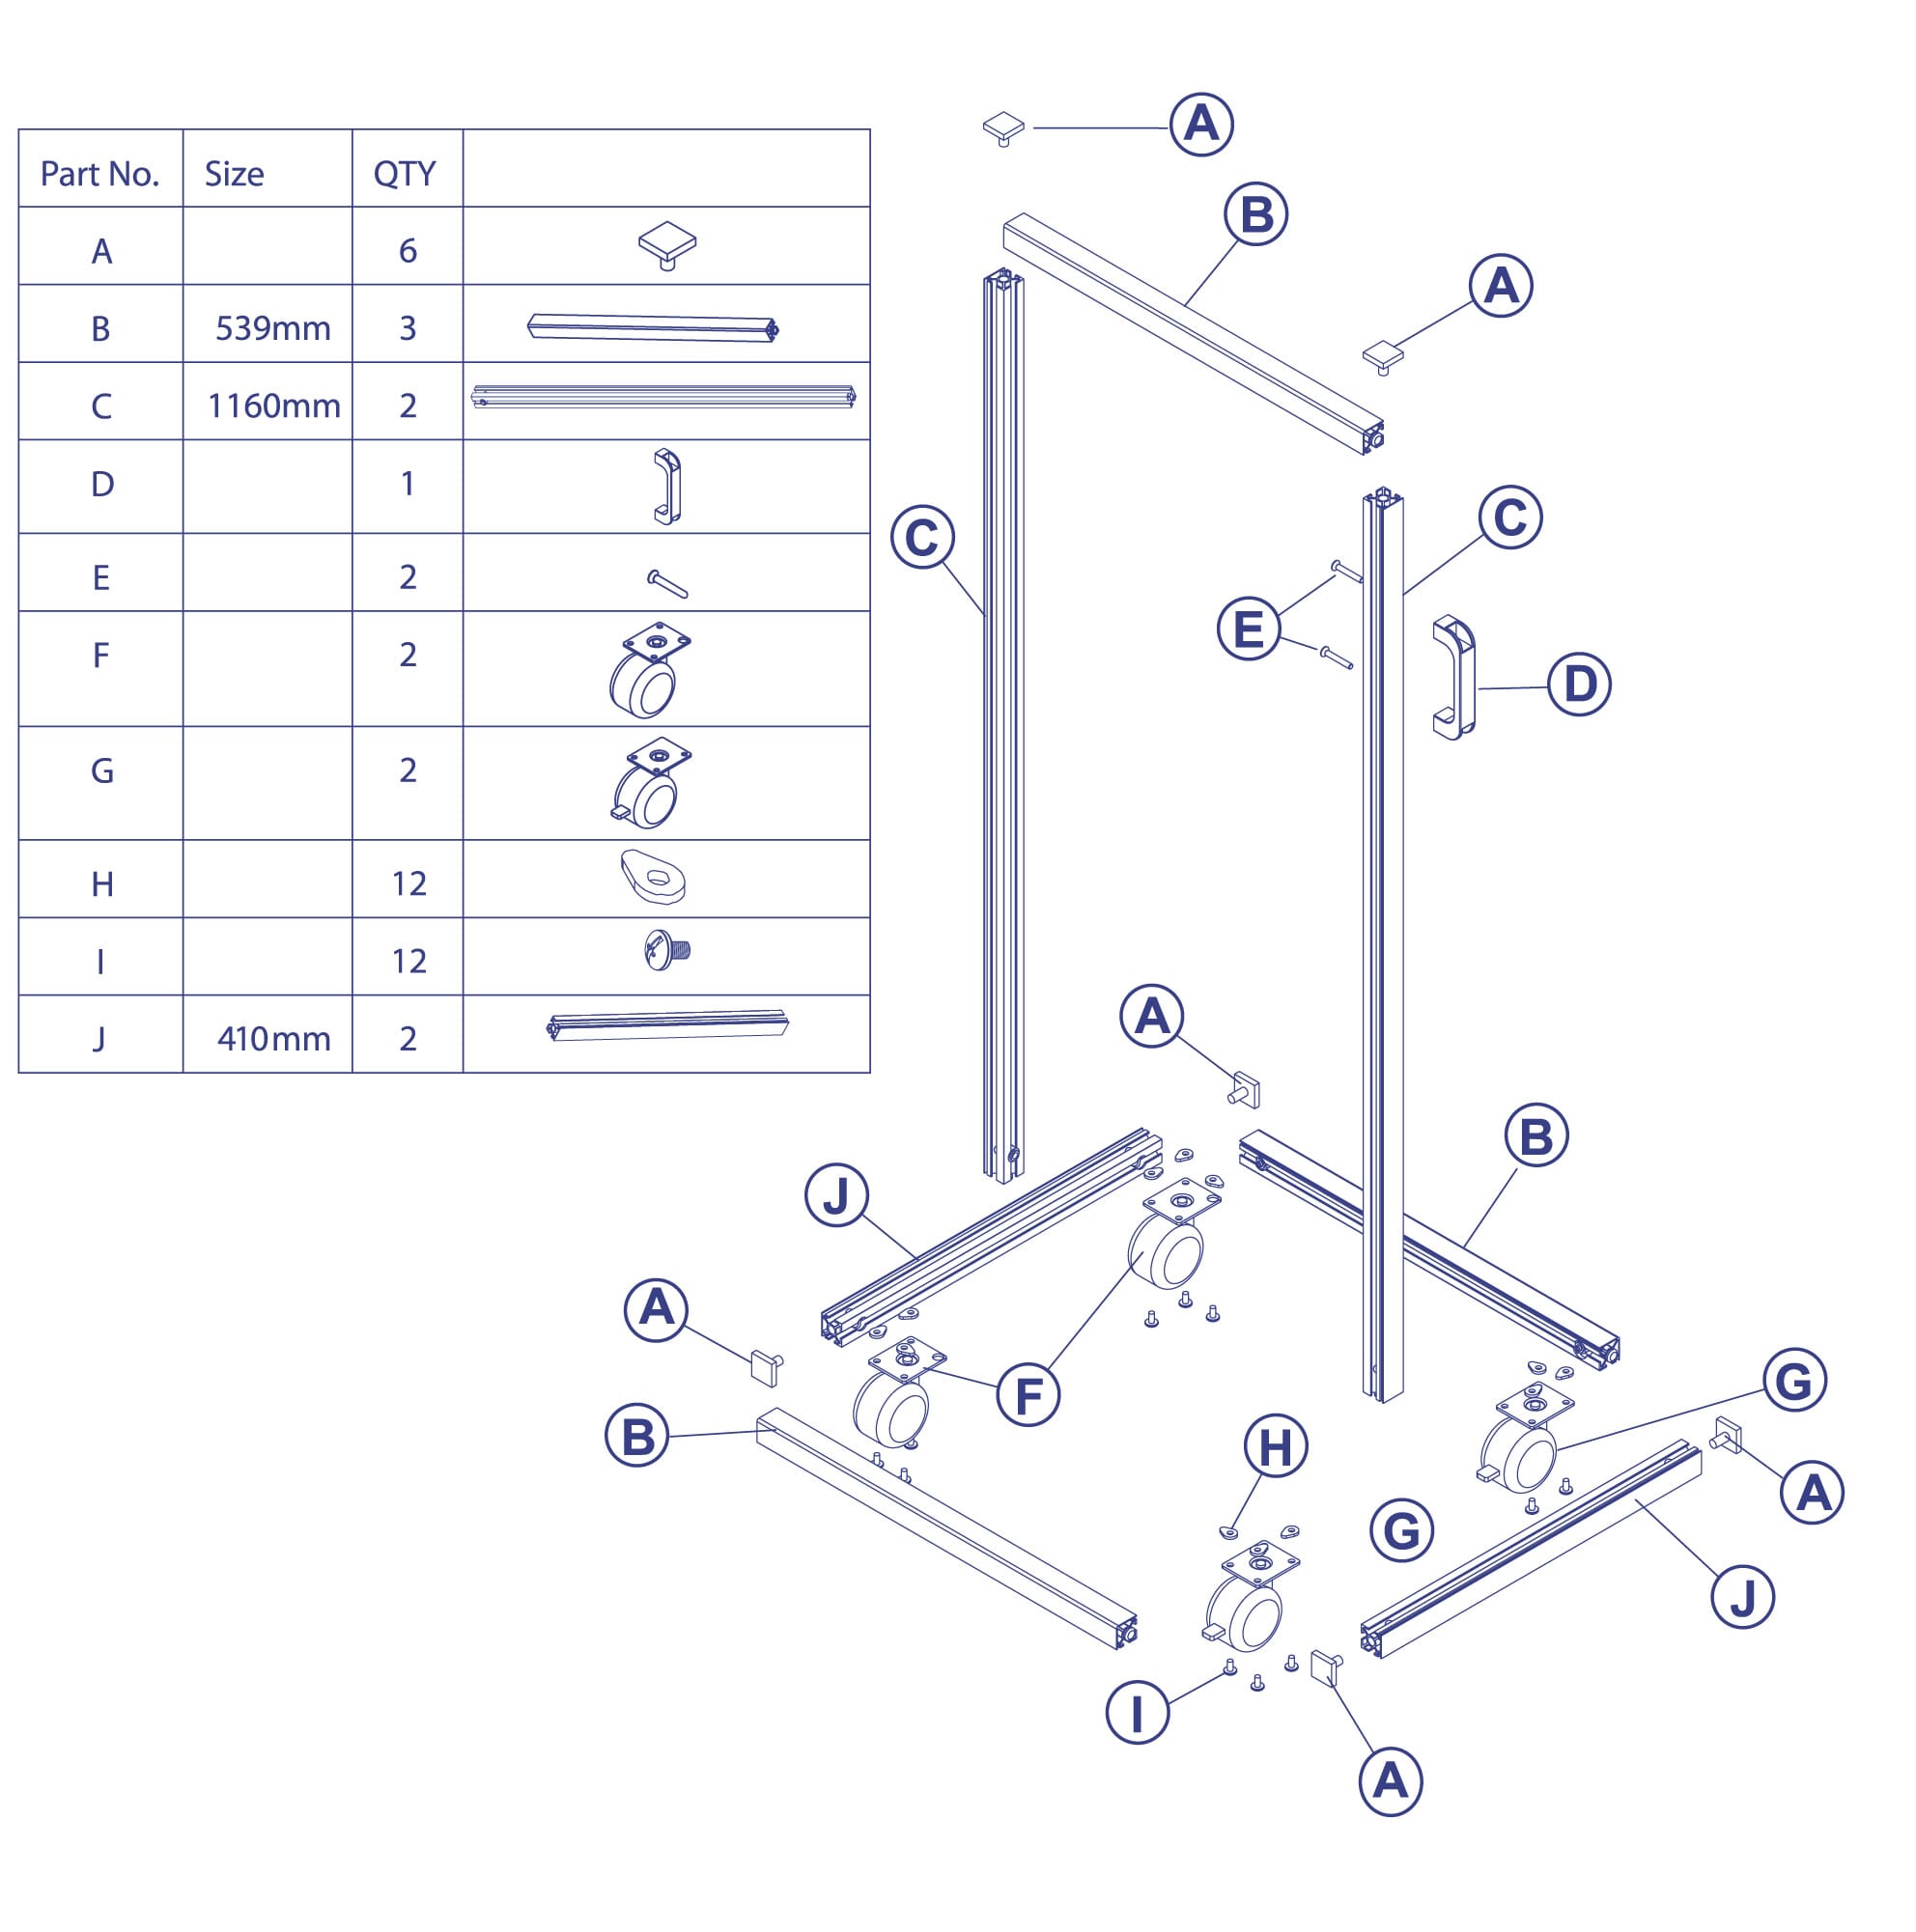
Parts included:
Step 1:
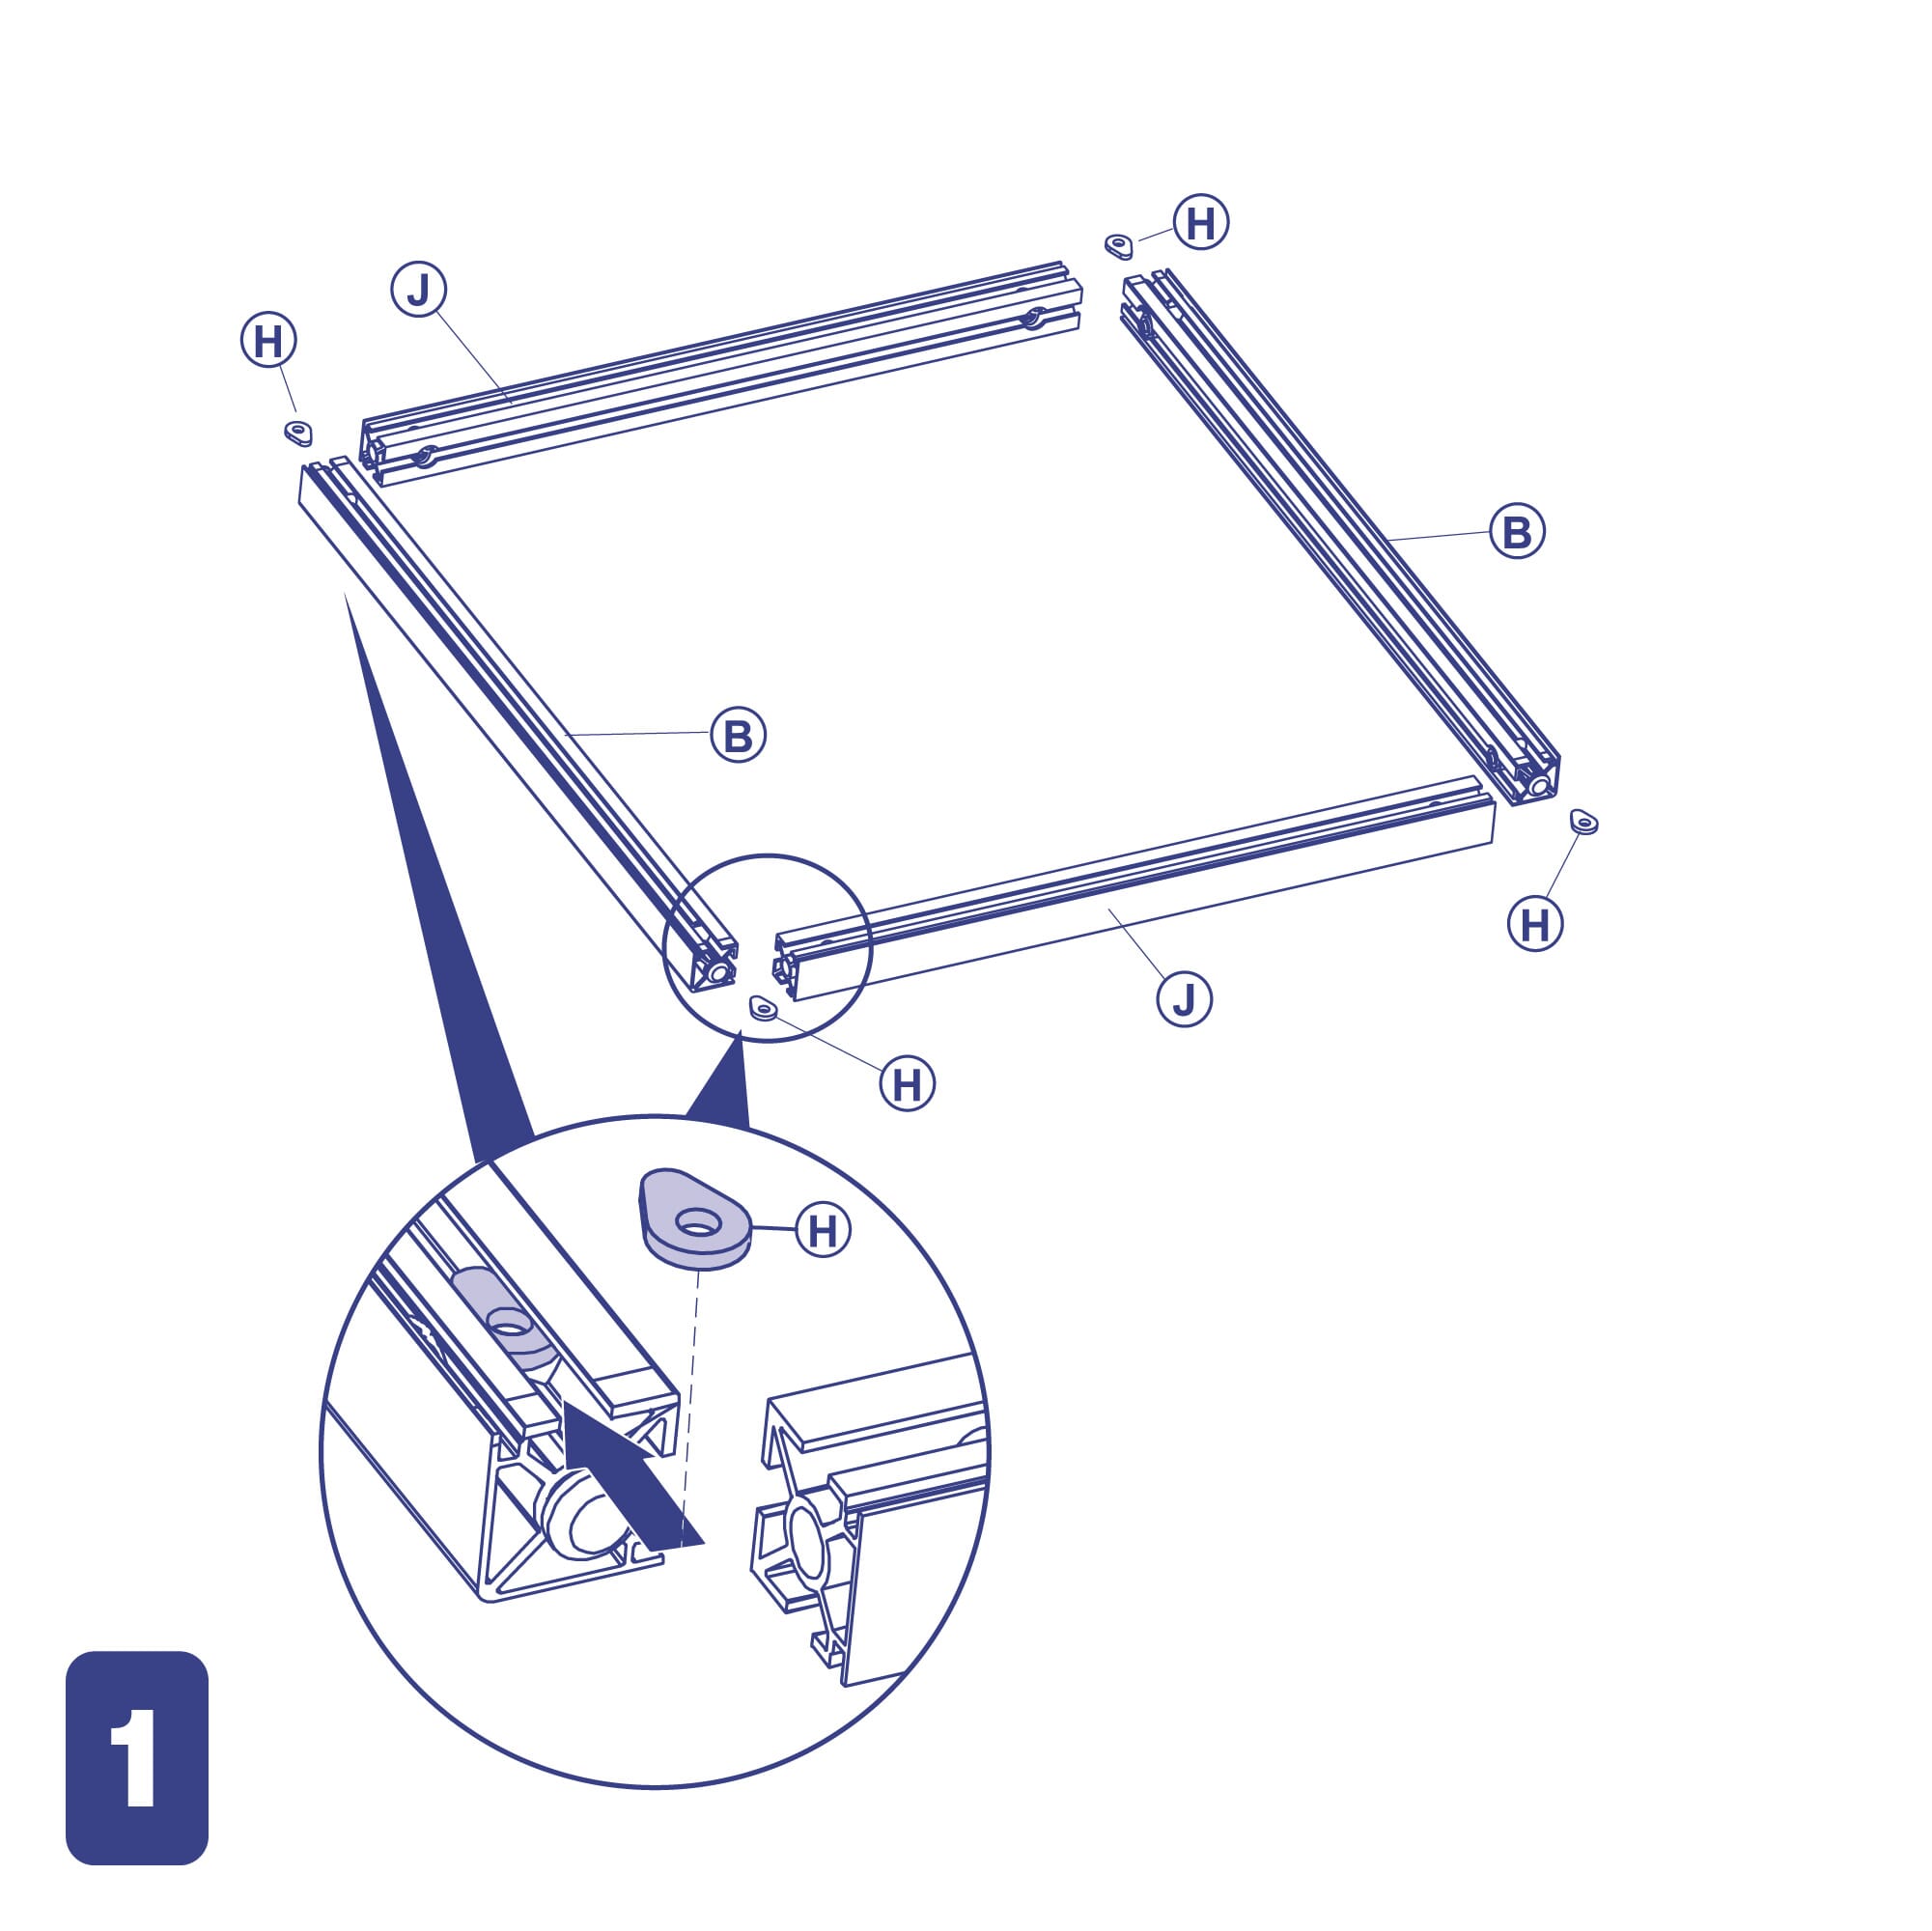
- Select 2 parts B, 4 parts H and 2 parts J.
- Arrange the 2 parts B and 2 parts J so they form a rectangle, the 2 parts B should form the longest sides.
- Insert parts H in the tracks at both extremities of each part B.
Step 2:
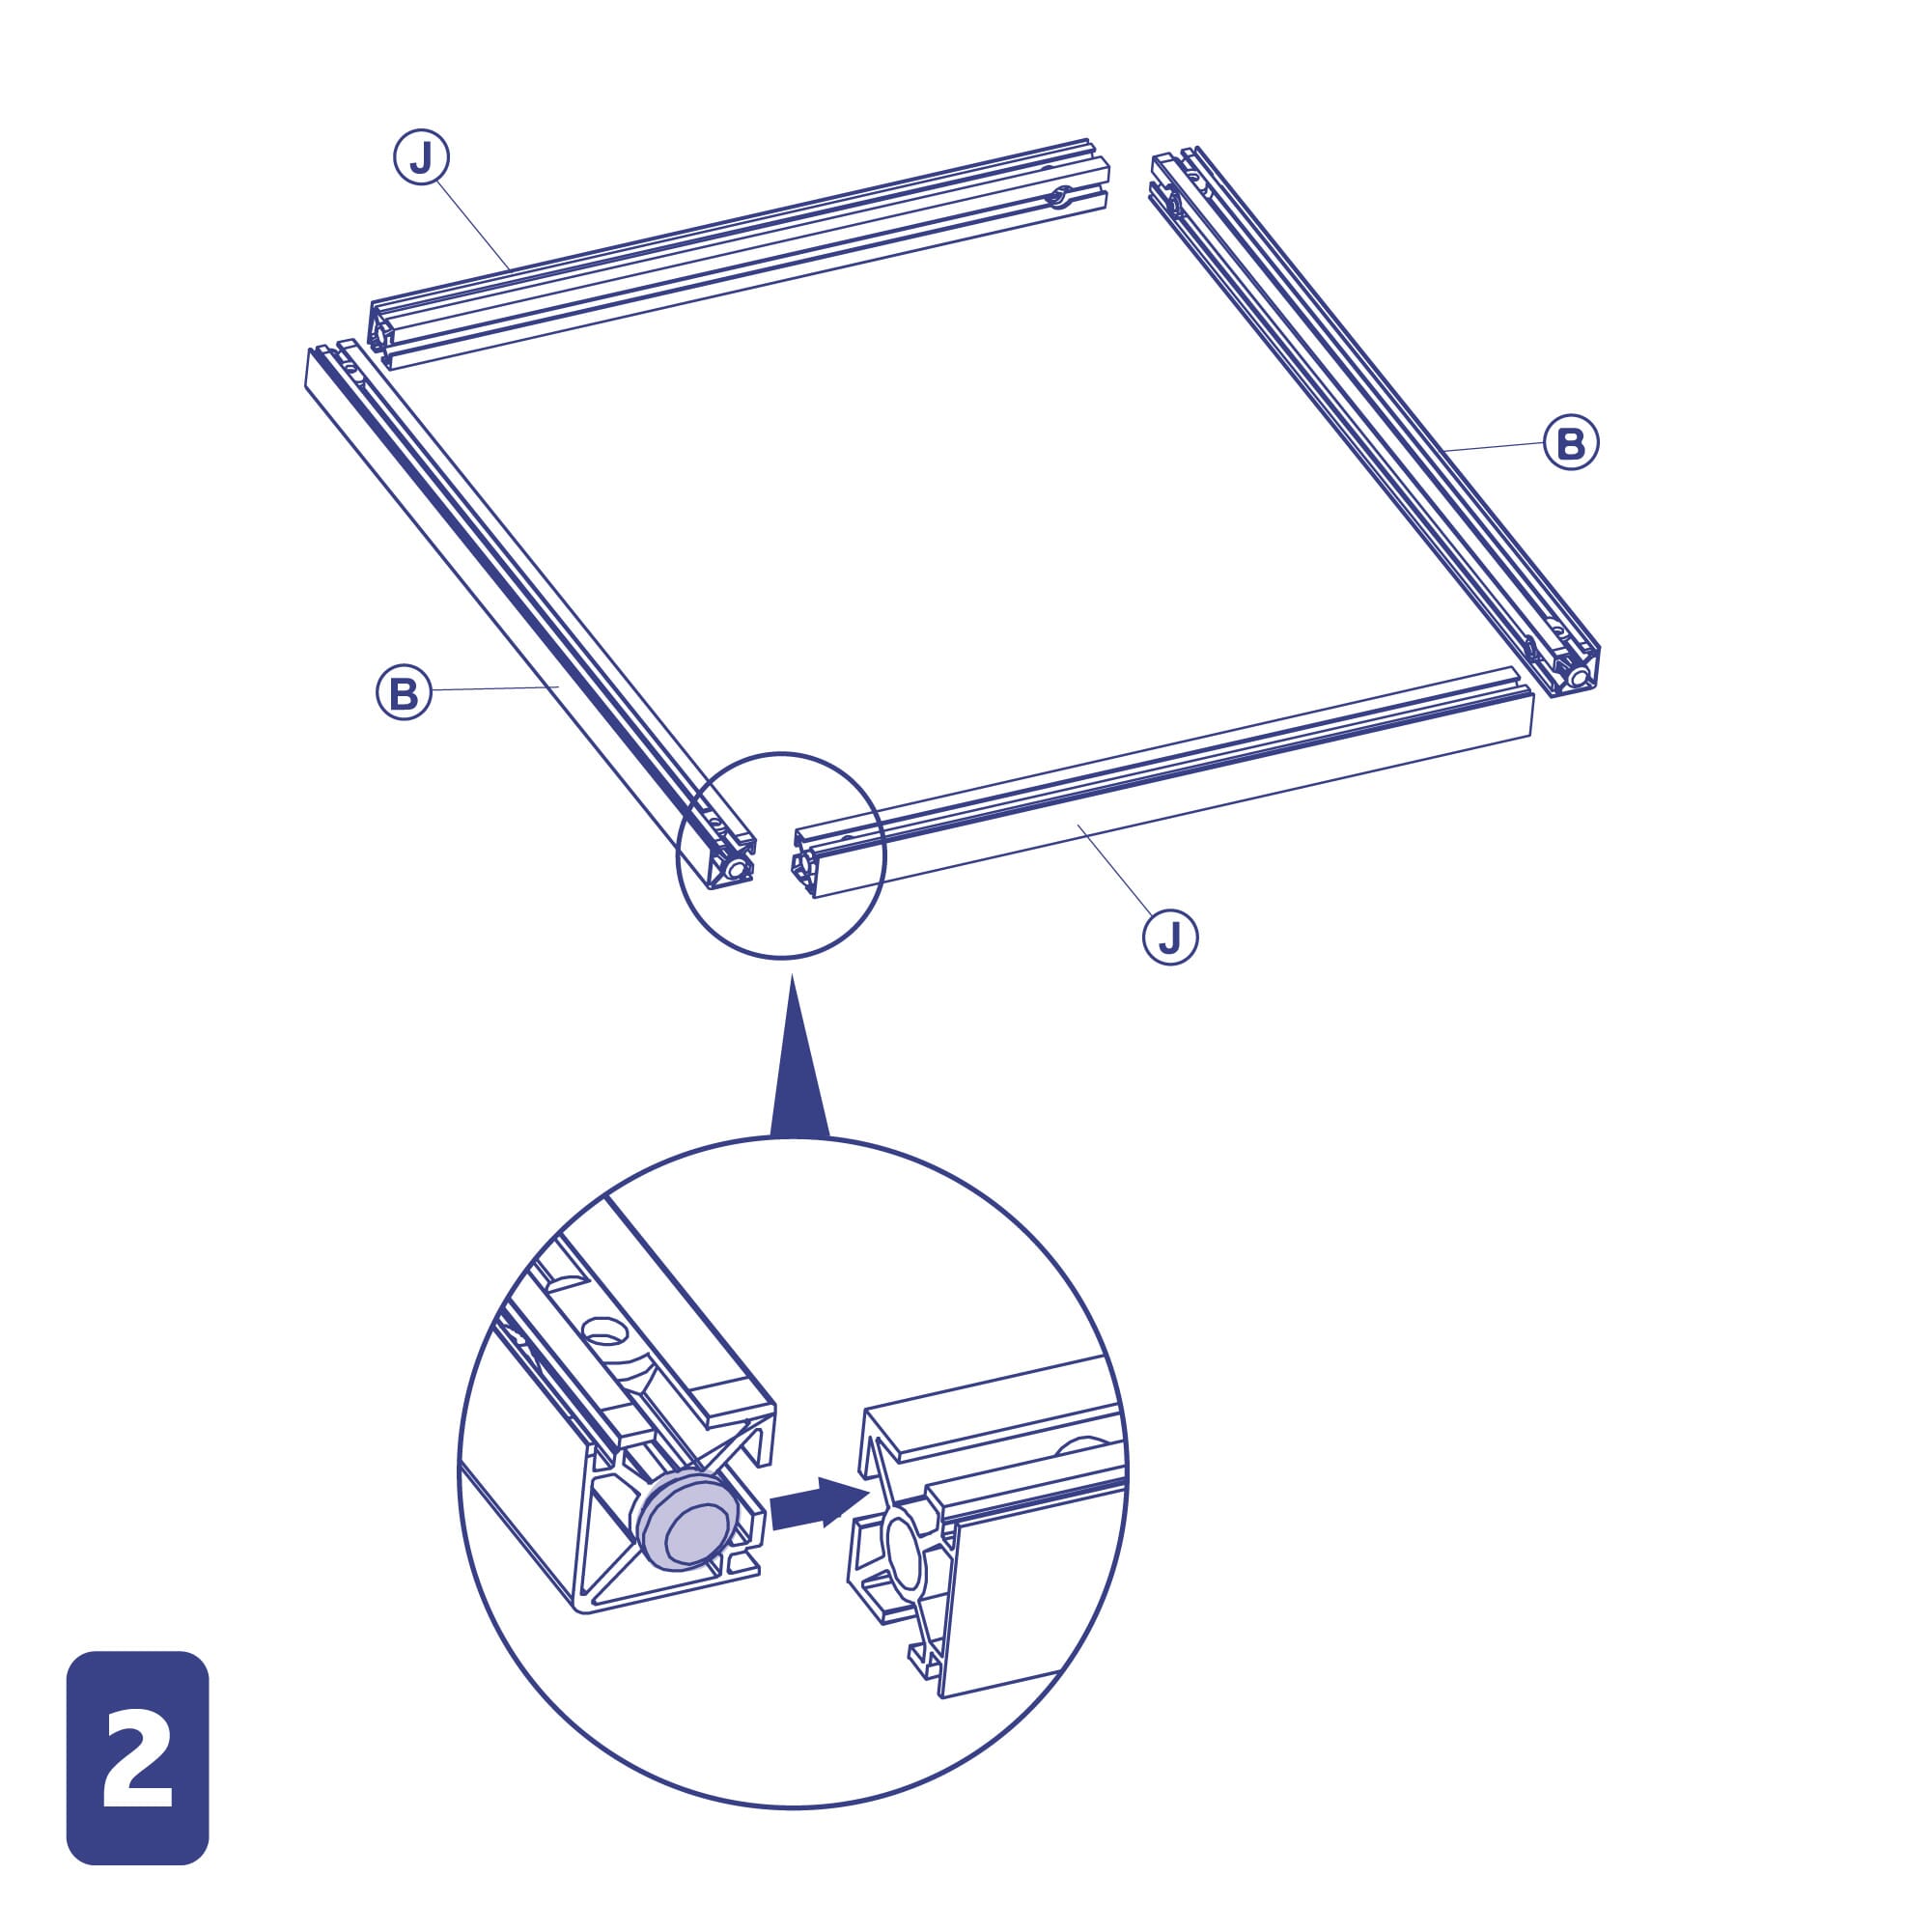
- Fit the ends of parts B into the tracks of parts J.
Step 3:
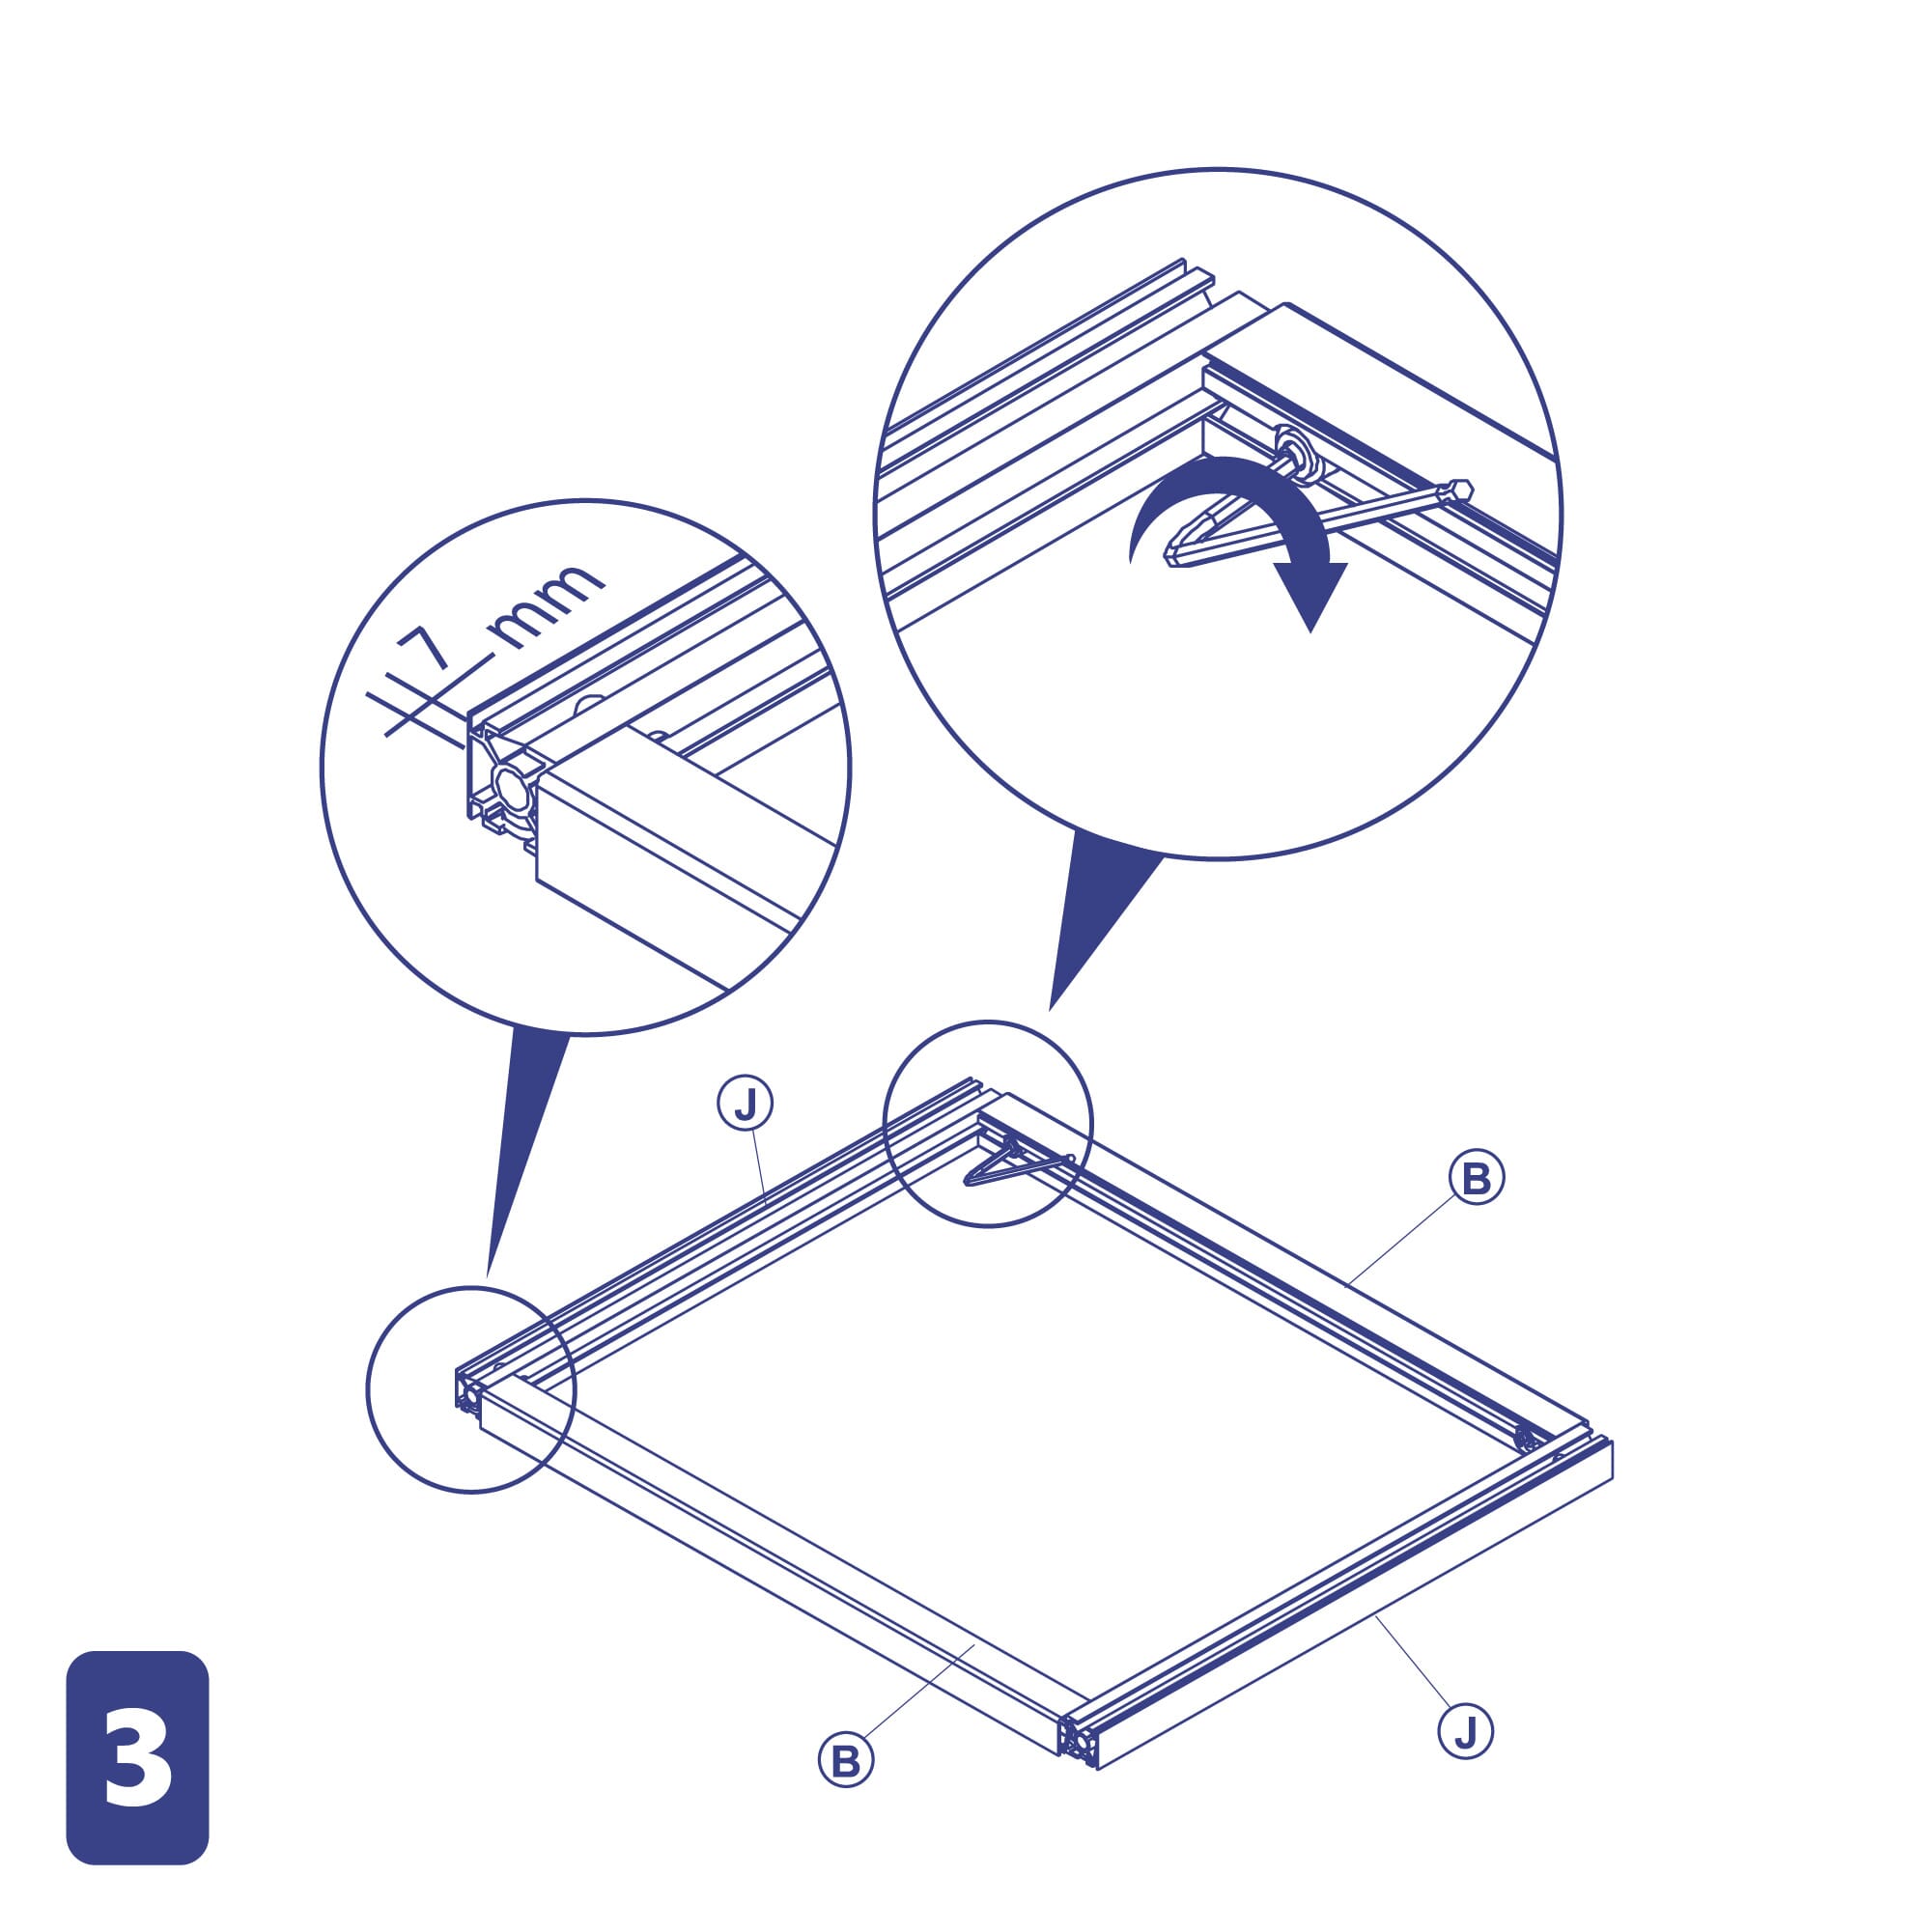
- Leave a little gap between the outside end of part B and the end of part J.
- With the provided Allen Key, tighten the bolts at the ends of part B.
Step 4:
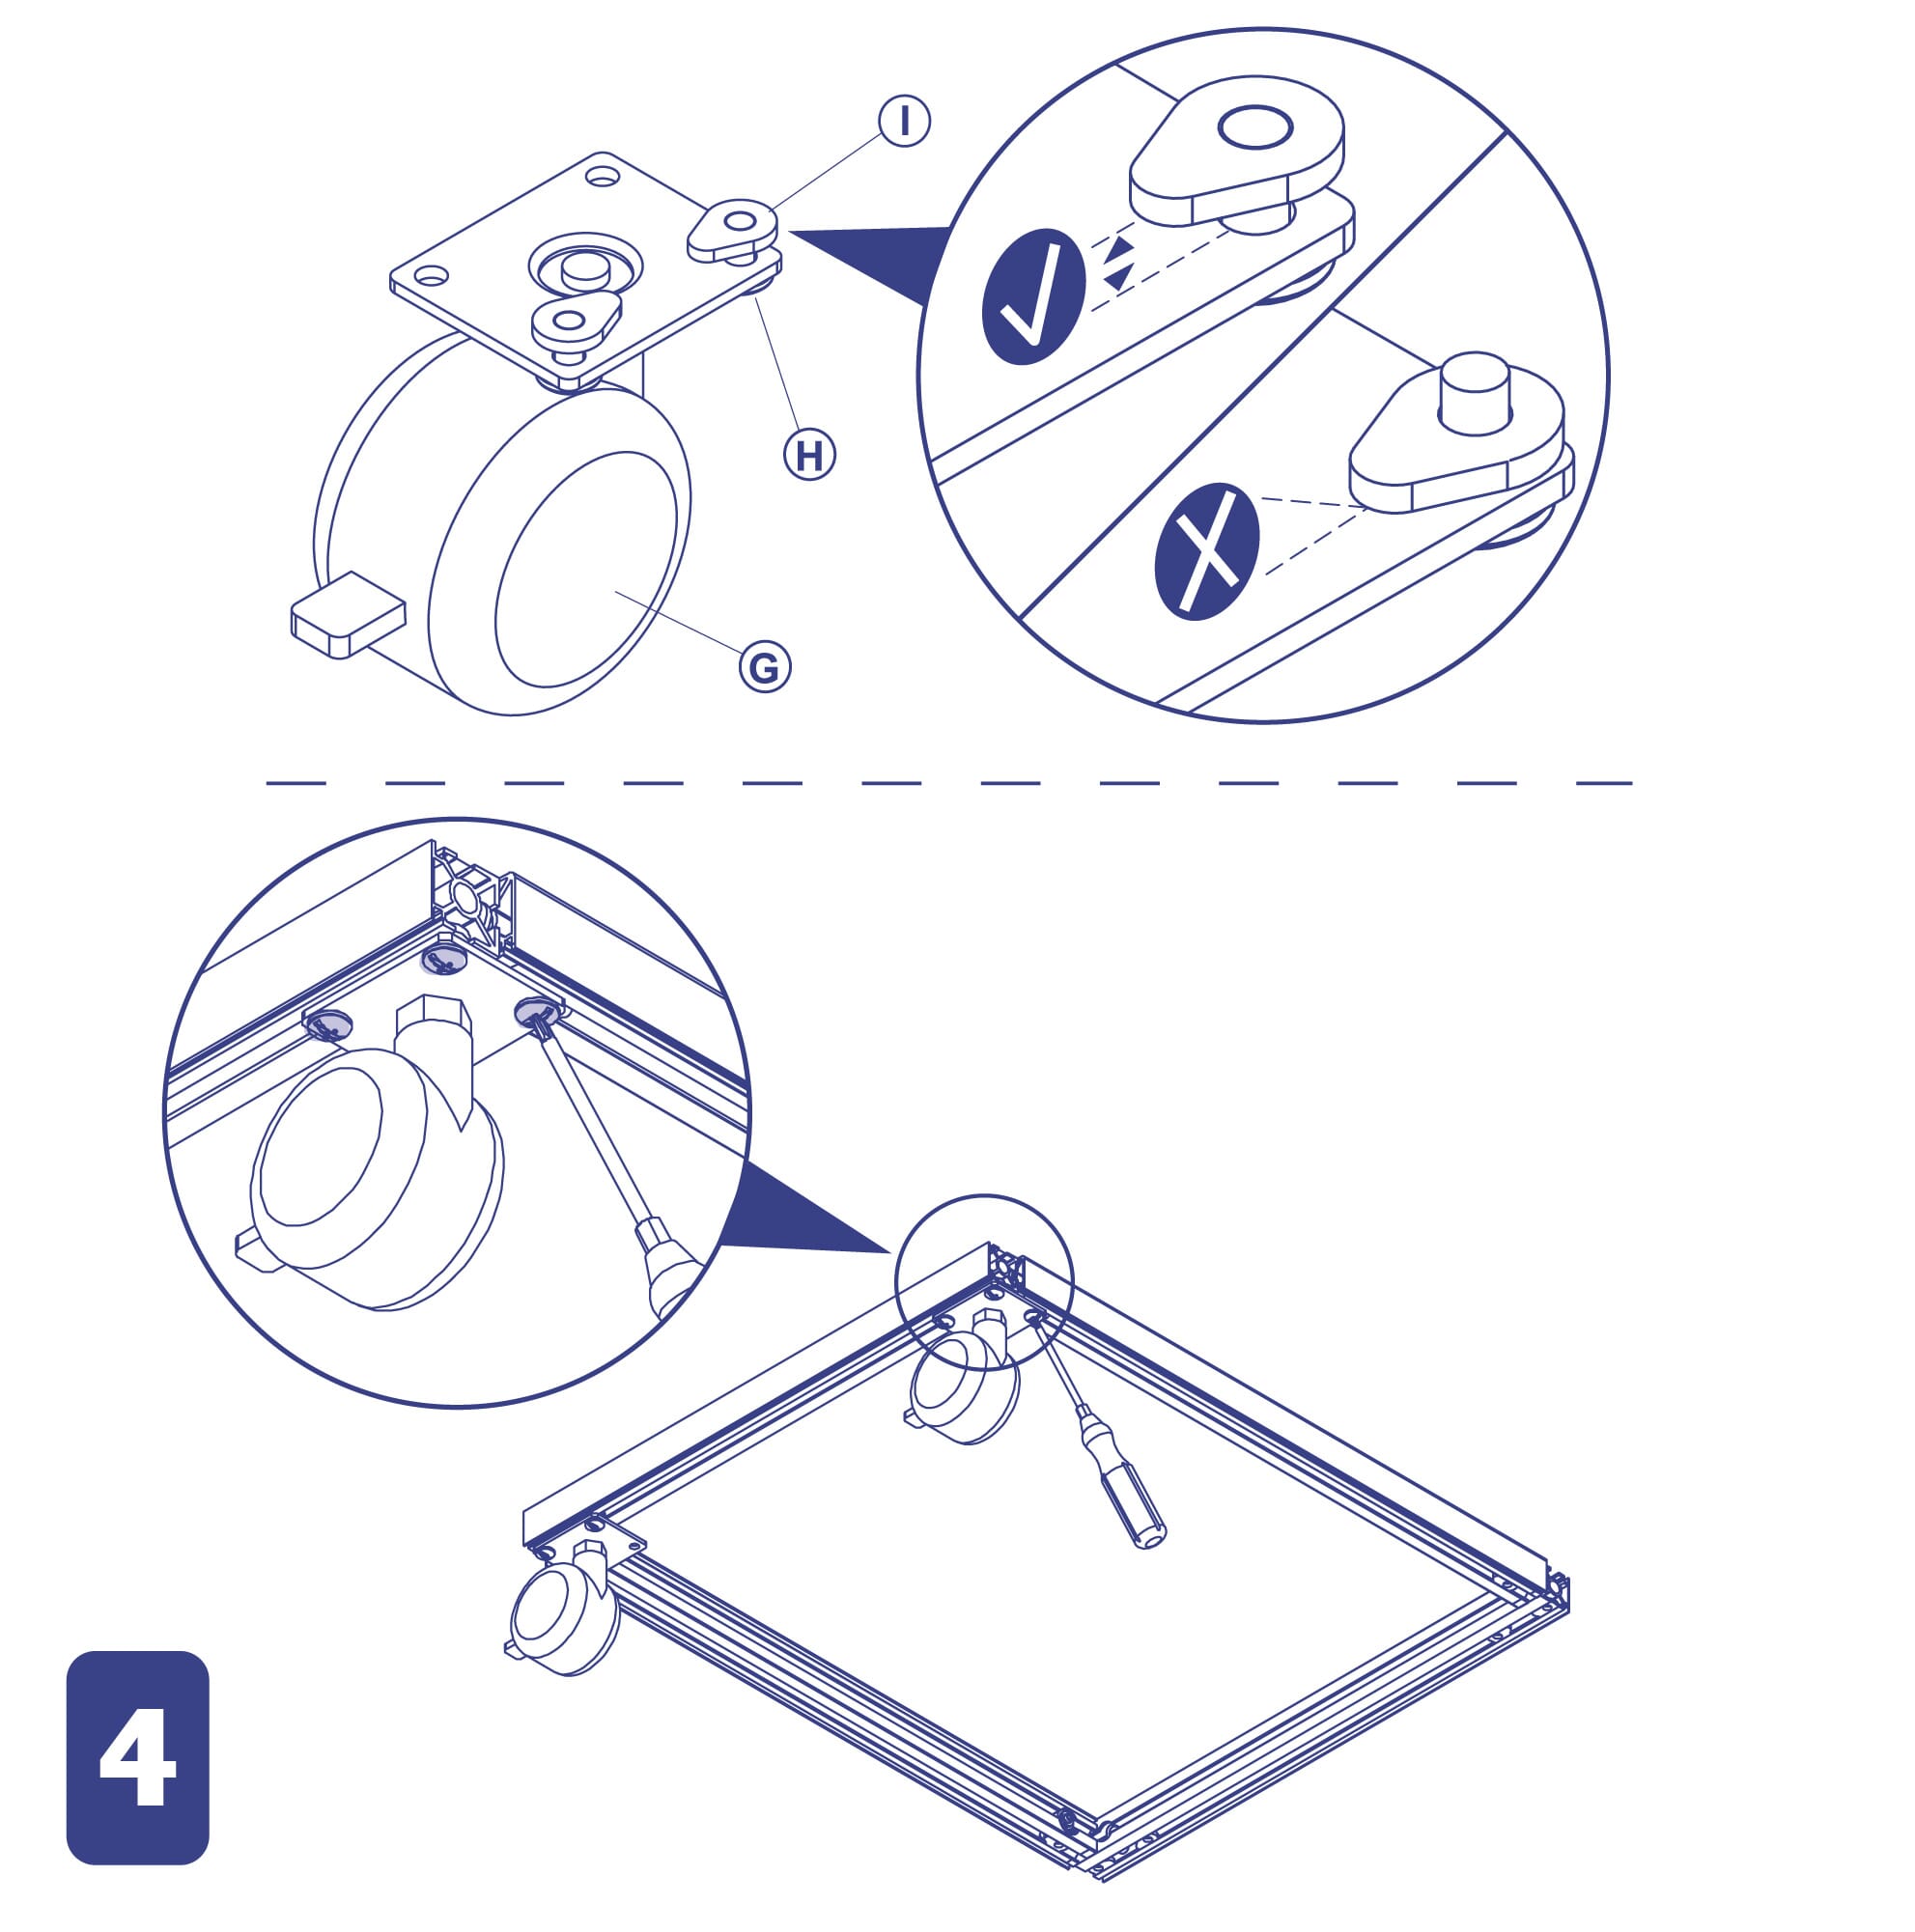
- Take 1 part G, 2 parts H and 3 parts I.
- From the underside of the Part G (wheel) top plate, insert the screws (part I) into 3 of the holes.
- Attach the 2 parts H to 2 of the screw posts. Do not push them all the way in.
- Attach the 3rd screw post to the part H that has been inserted into part B.
- Repeat the above 4 steps for the remaining part G. Caution: It’s important to install the 2nd wheel to the other extremity of the same part B to which you installed the first wheel.
Step 5:
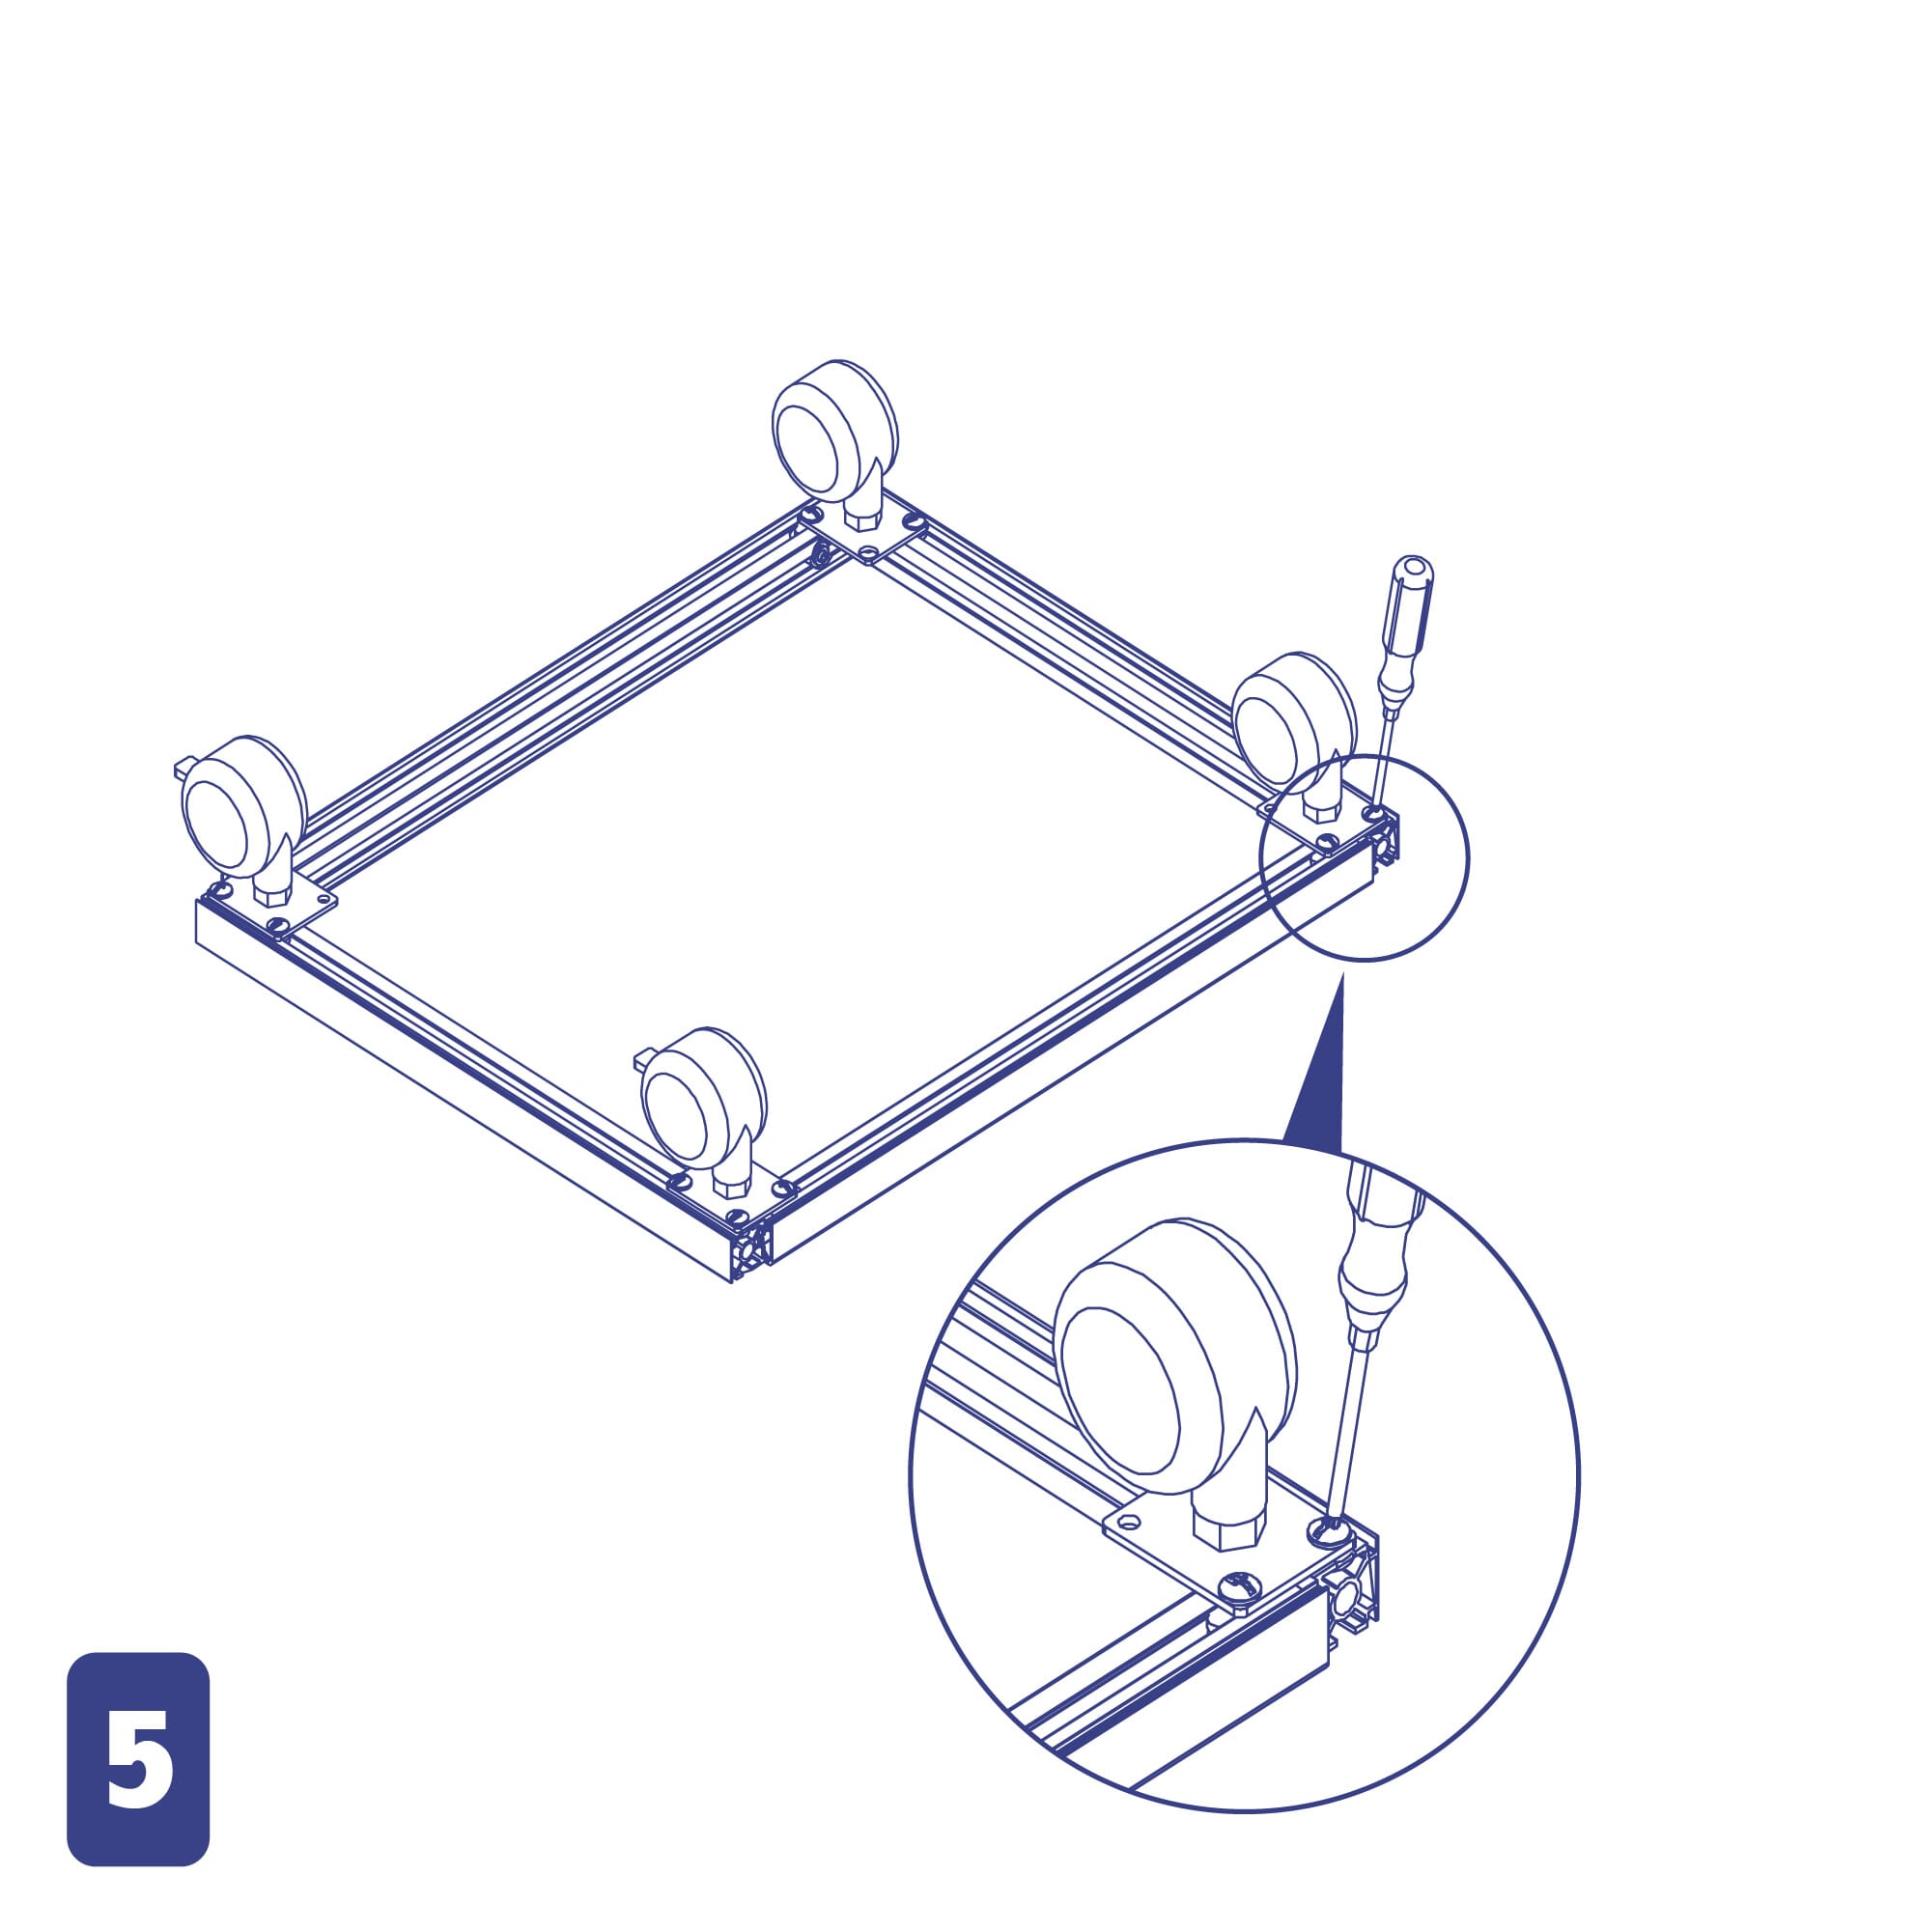
- Take 1 part F, 2 parts H and 3 parts I. From the underside of the Part F (wheel) top plate, insert the screws (part I) into 3 of the holes.
- Attach the 2 parts H to 2 of the screw posts. Do not push them all the way in.
- Attach the 3rd screw post to the part H that has been inserted into part B.
- Repeat the above 4 steps for the remaining part F. Caution: It’s important to install the 2nd wheel to the other extremity of the same part B to which you installed the first wheel.
Now your base is ready!
Step 6:
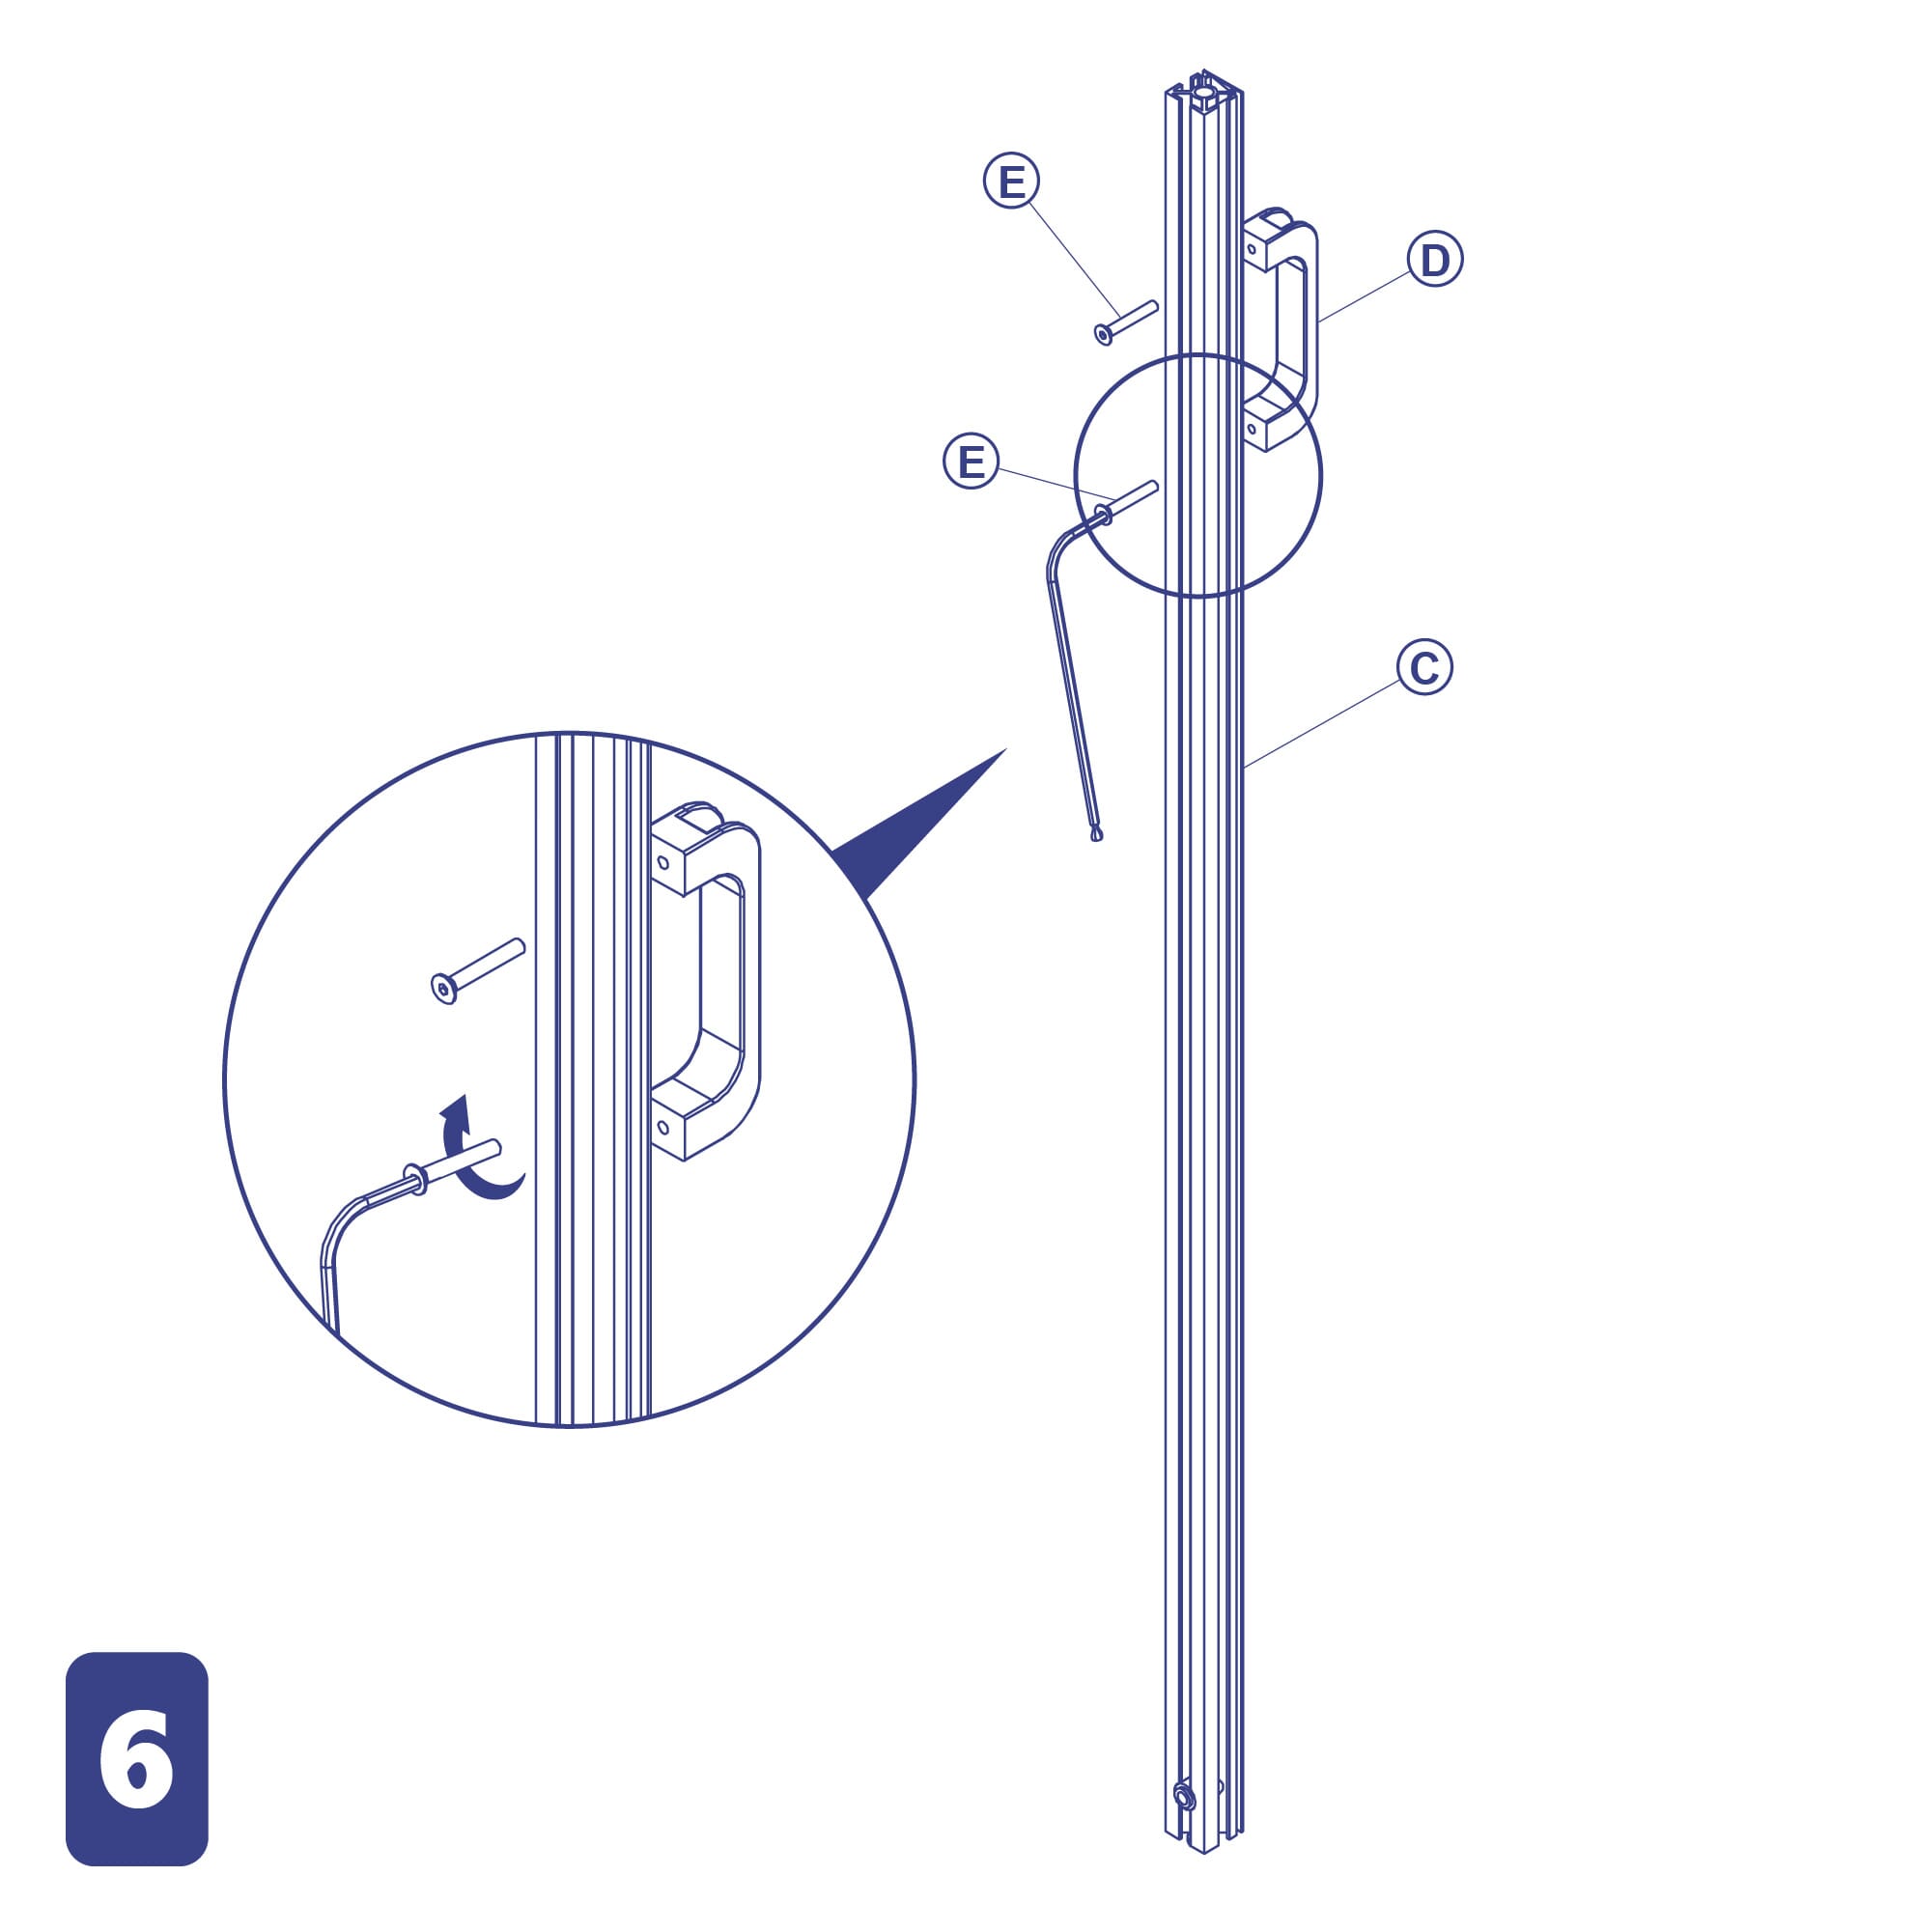
- Select 1 part C, 1 part D, and 2 parts E.
- Use the two pins (parts E) to attach the handle (part D) to the rail (part C).
Step 7:
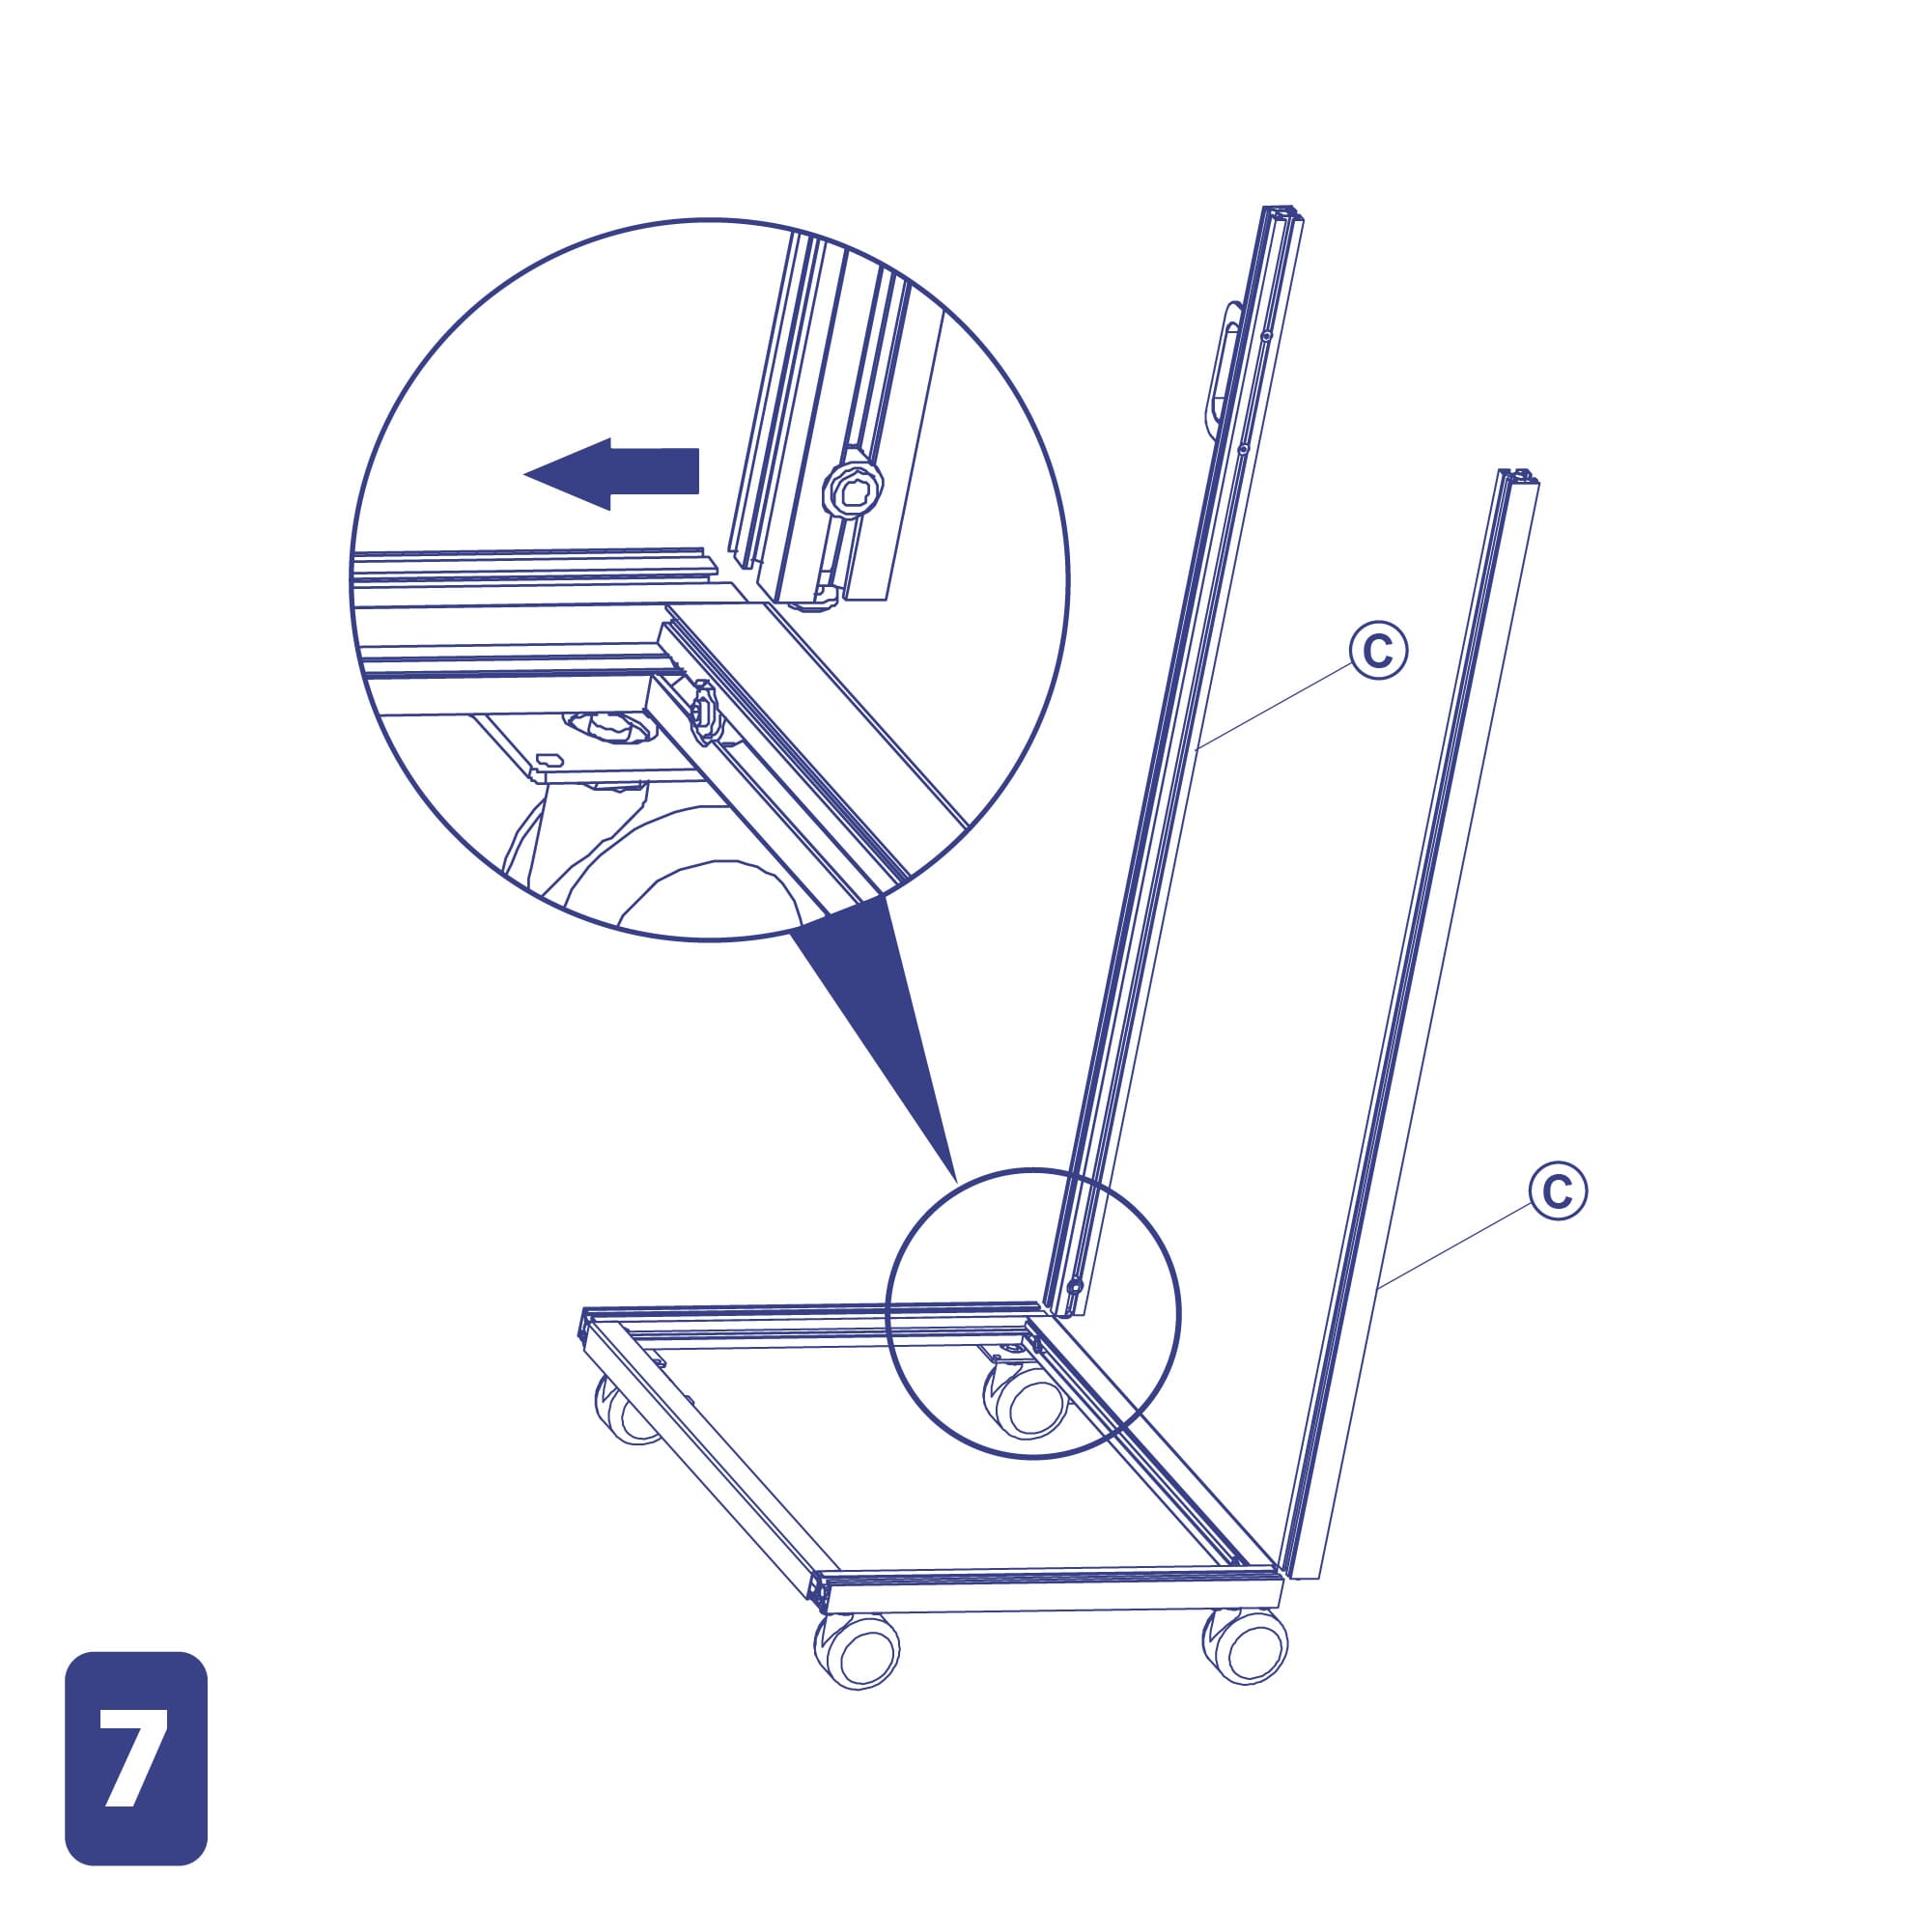
- Select both rails (part C) and the base created in steps 1-5.
- Install the two rails onto the base by sliding the bottom of the rail into the tracks of the base.
(CAUTION: The handle on the rail has to face the outside of the base.)
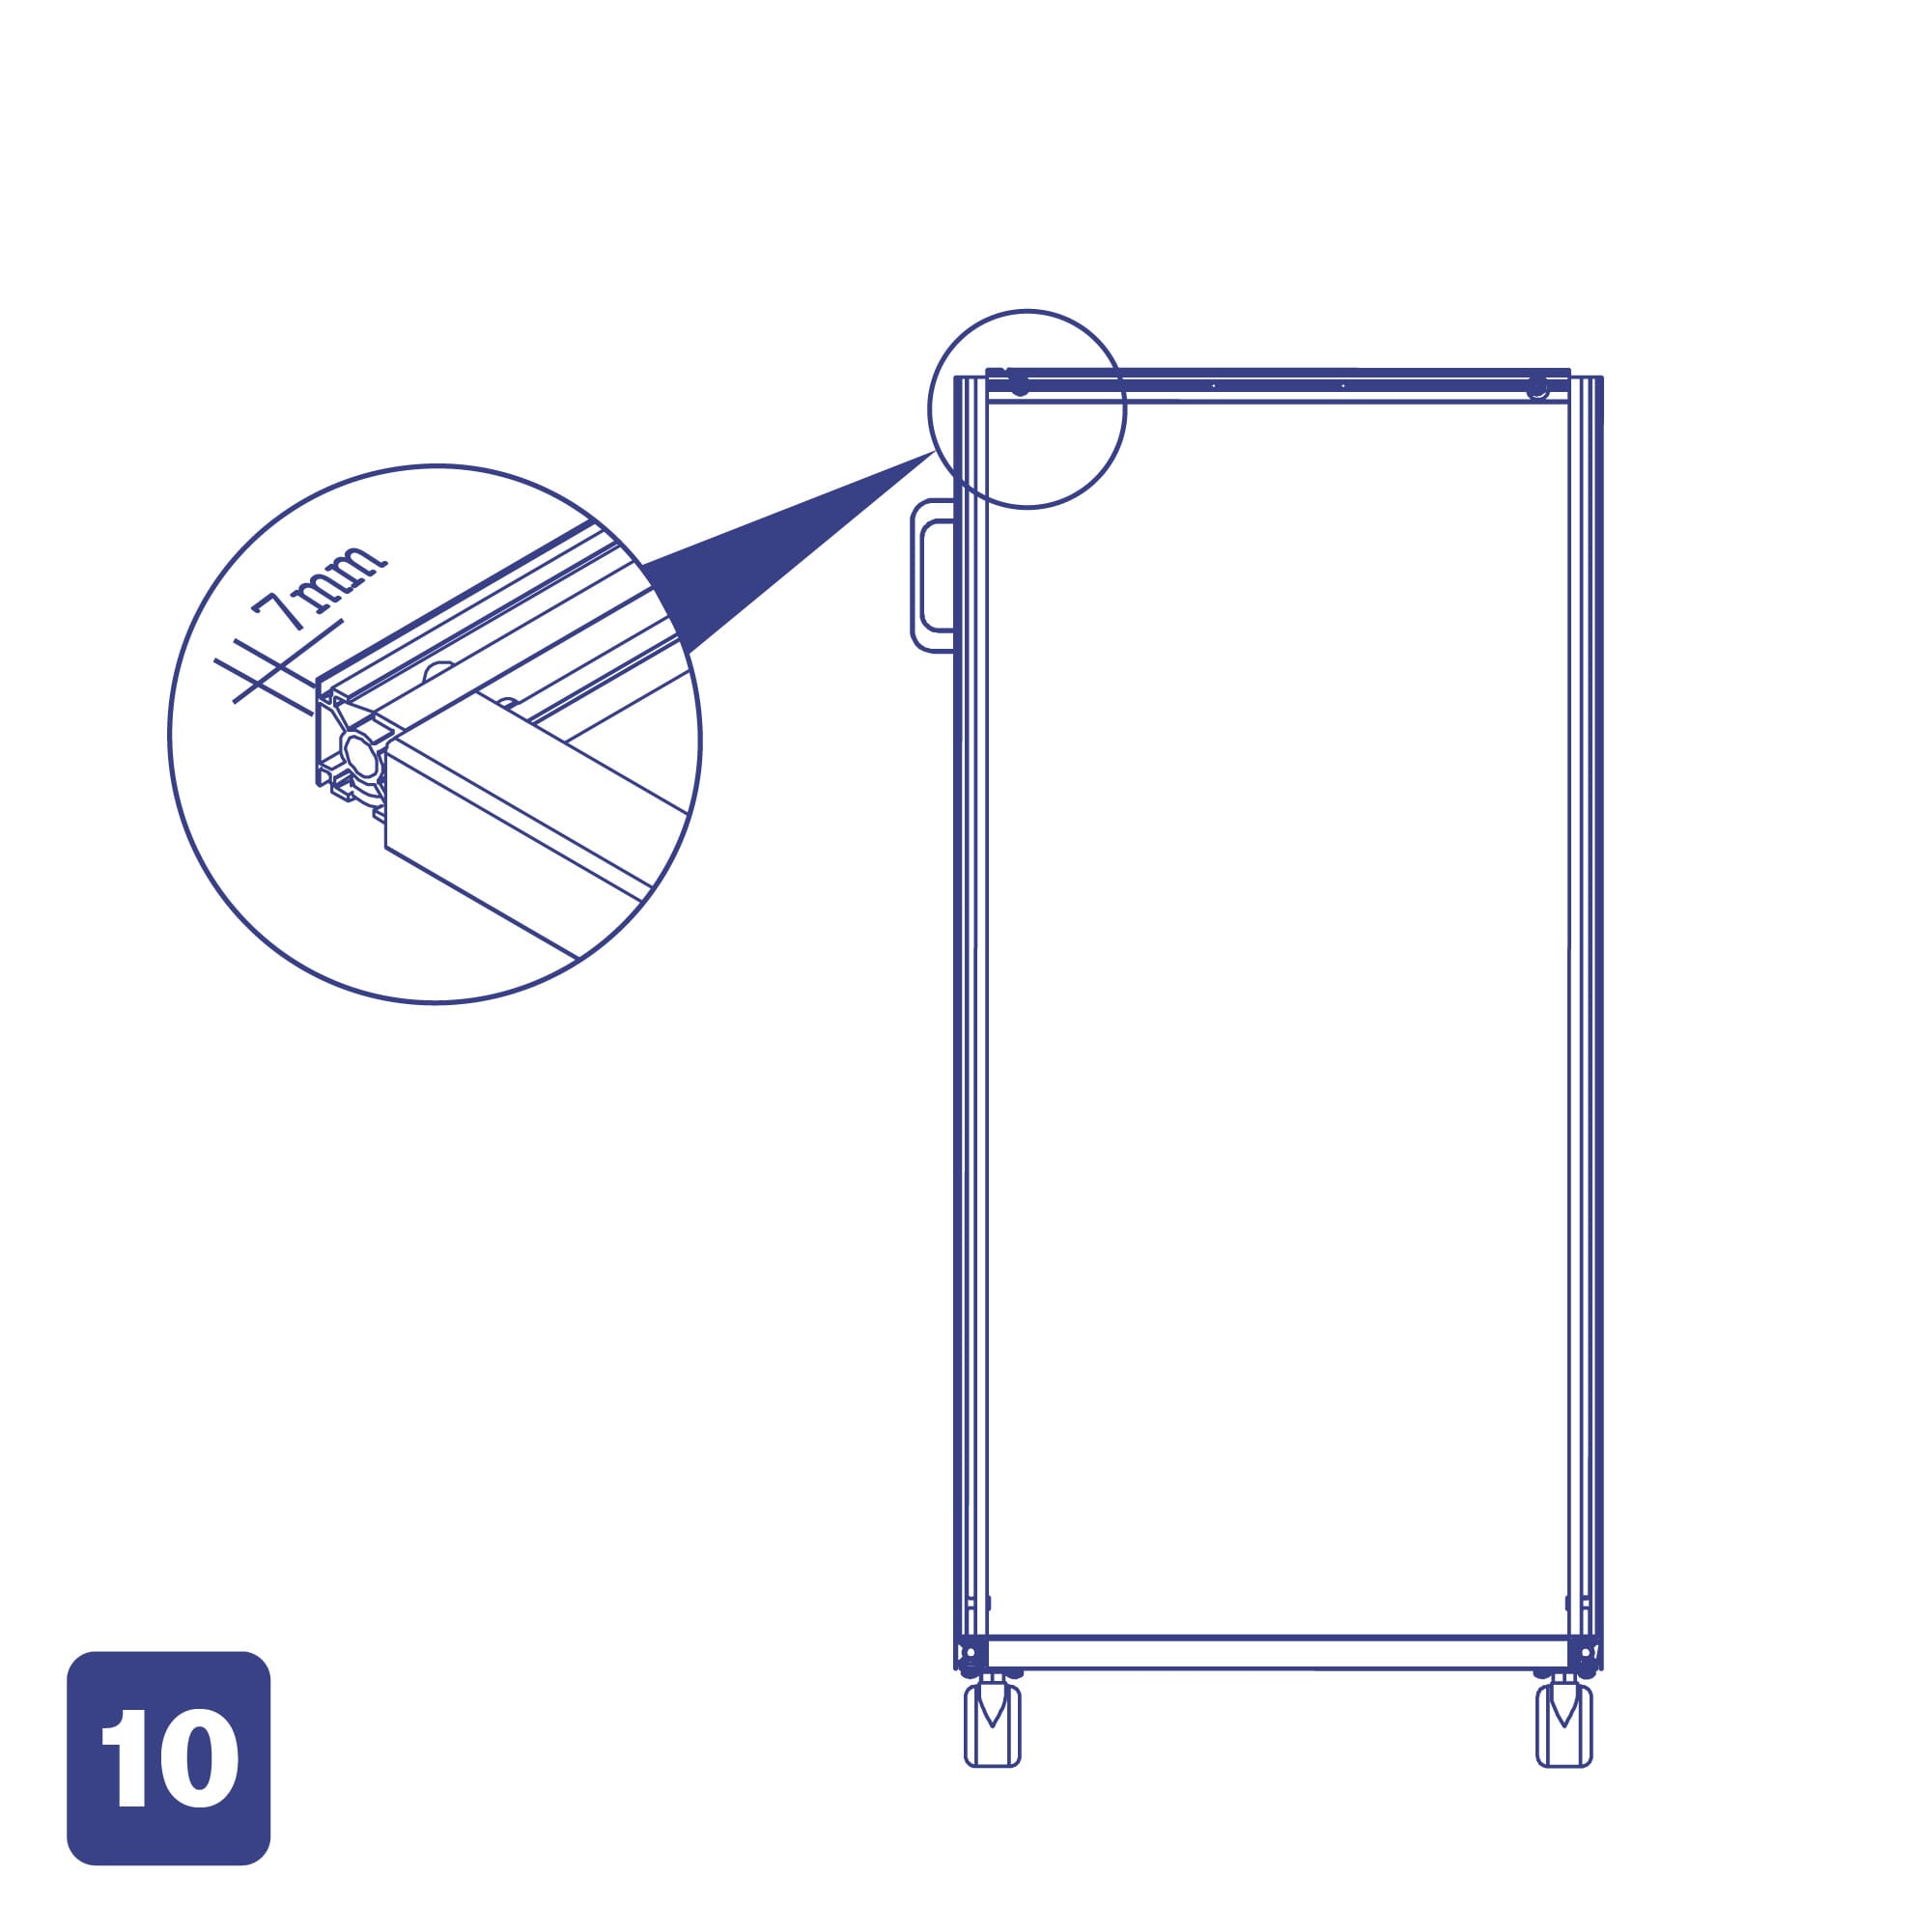
Step 8:

- Slide the rails to the middle of the base (approx. 7.5” from the extremities of part J).
- Lock them in place by tightening the bolt at the bottom of the rail using the Allen key.
Step 9 & 10:
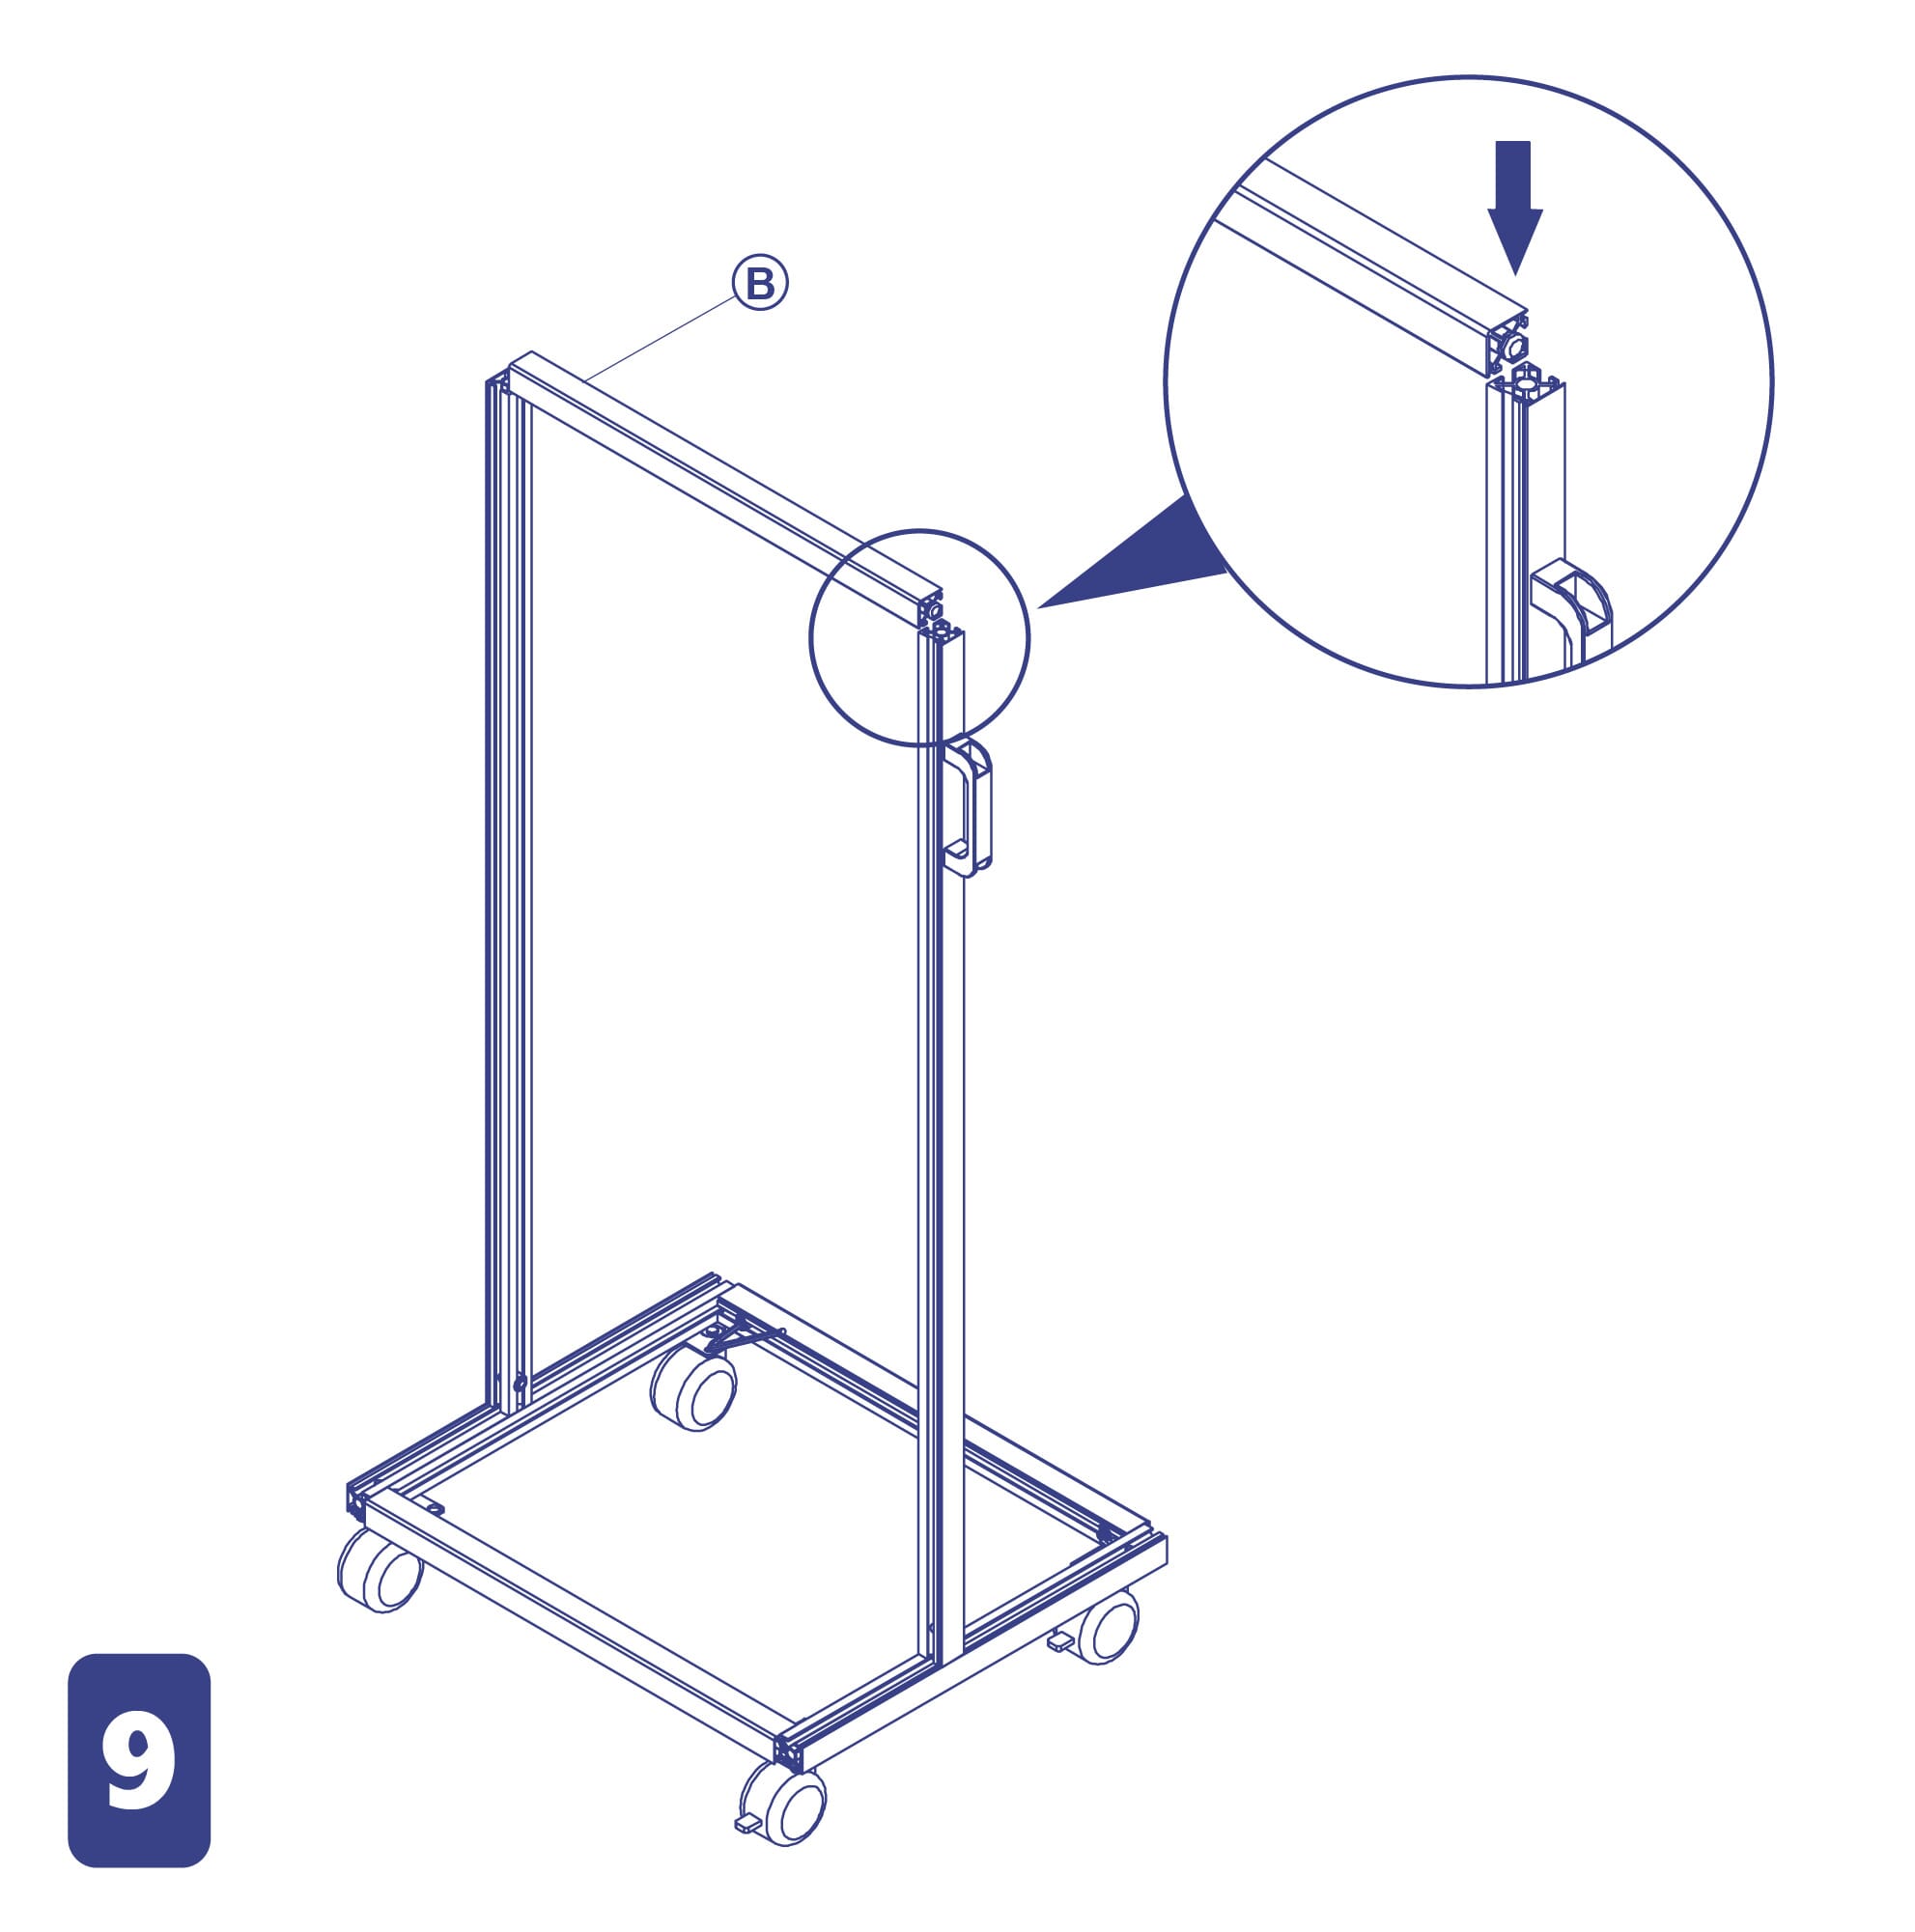
- Take the last part B.
- Insert it at the top of the two rails.
Step 11:
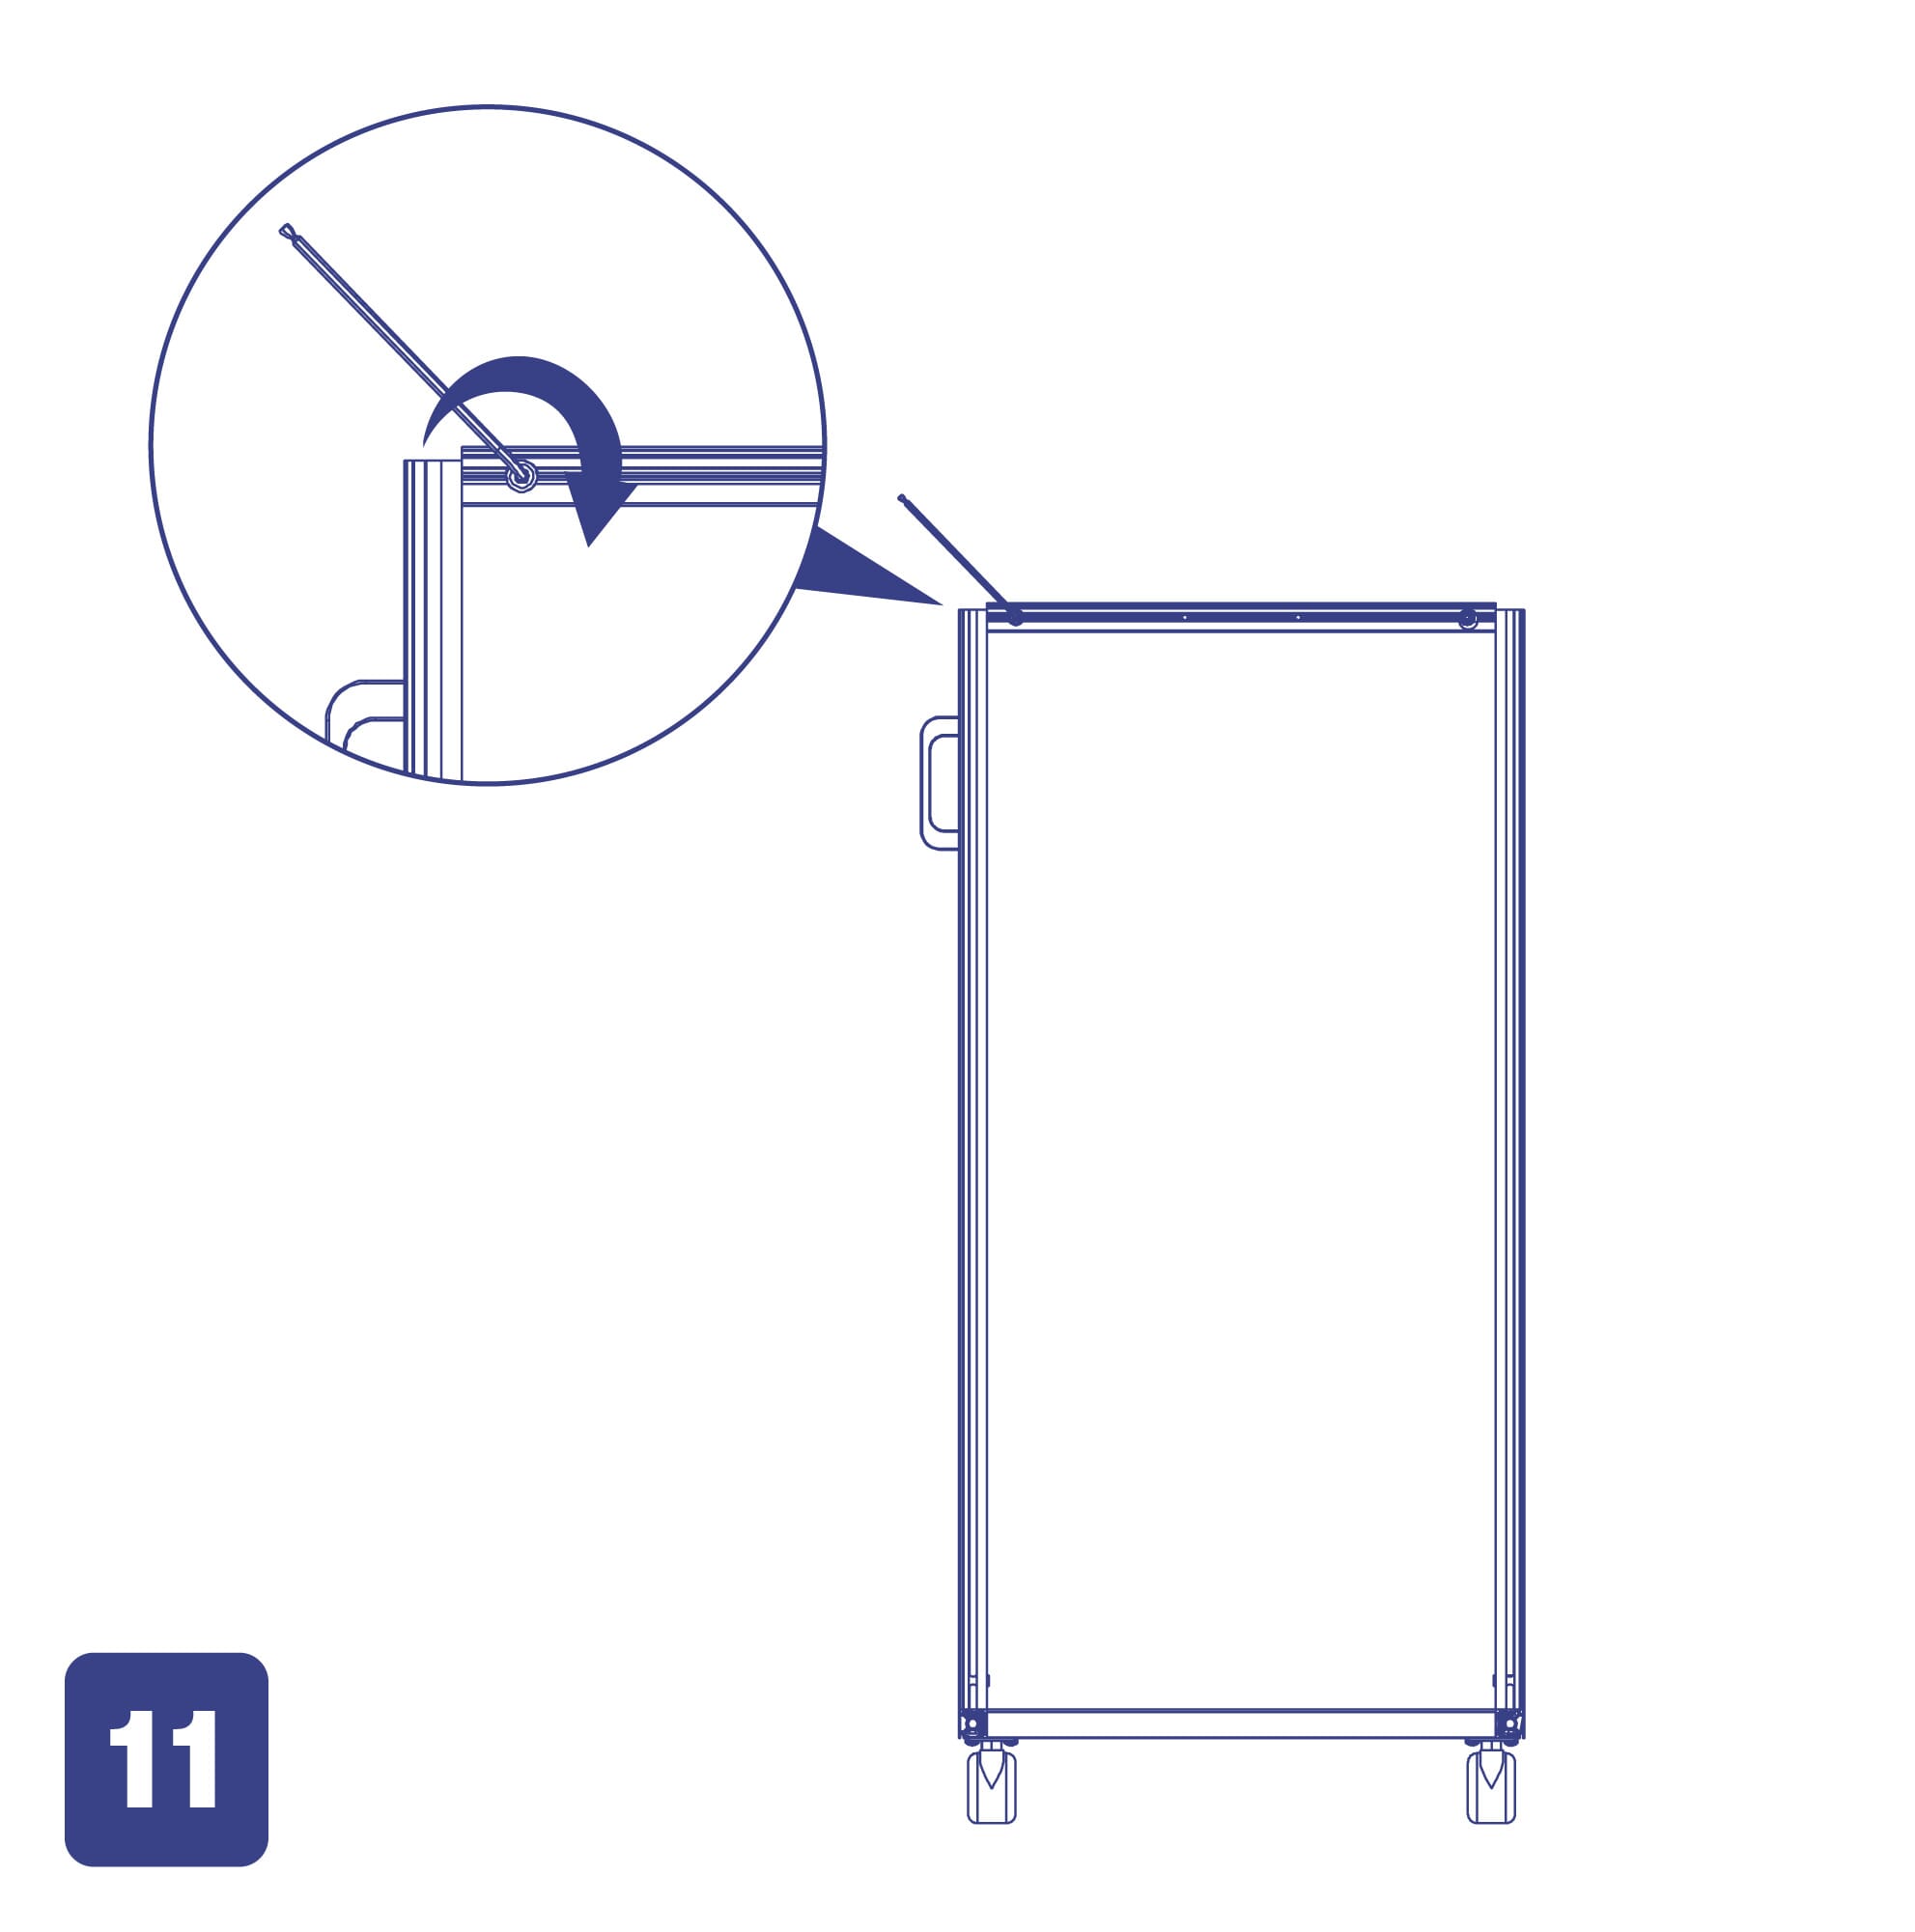
- Lock the part B into place by tightening the bolts near the extremities using the Allen key.
Step 12:
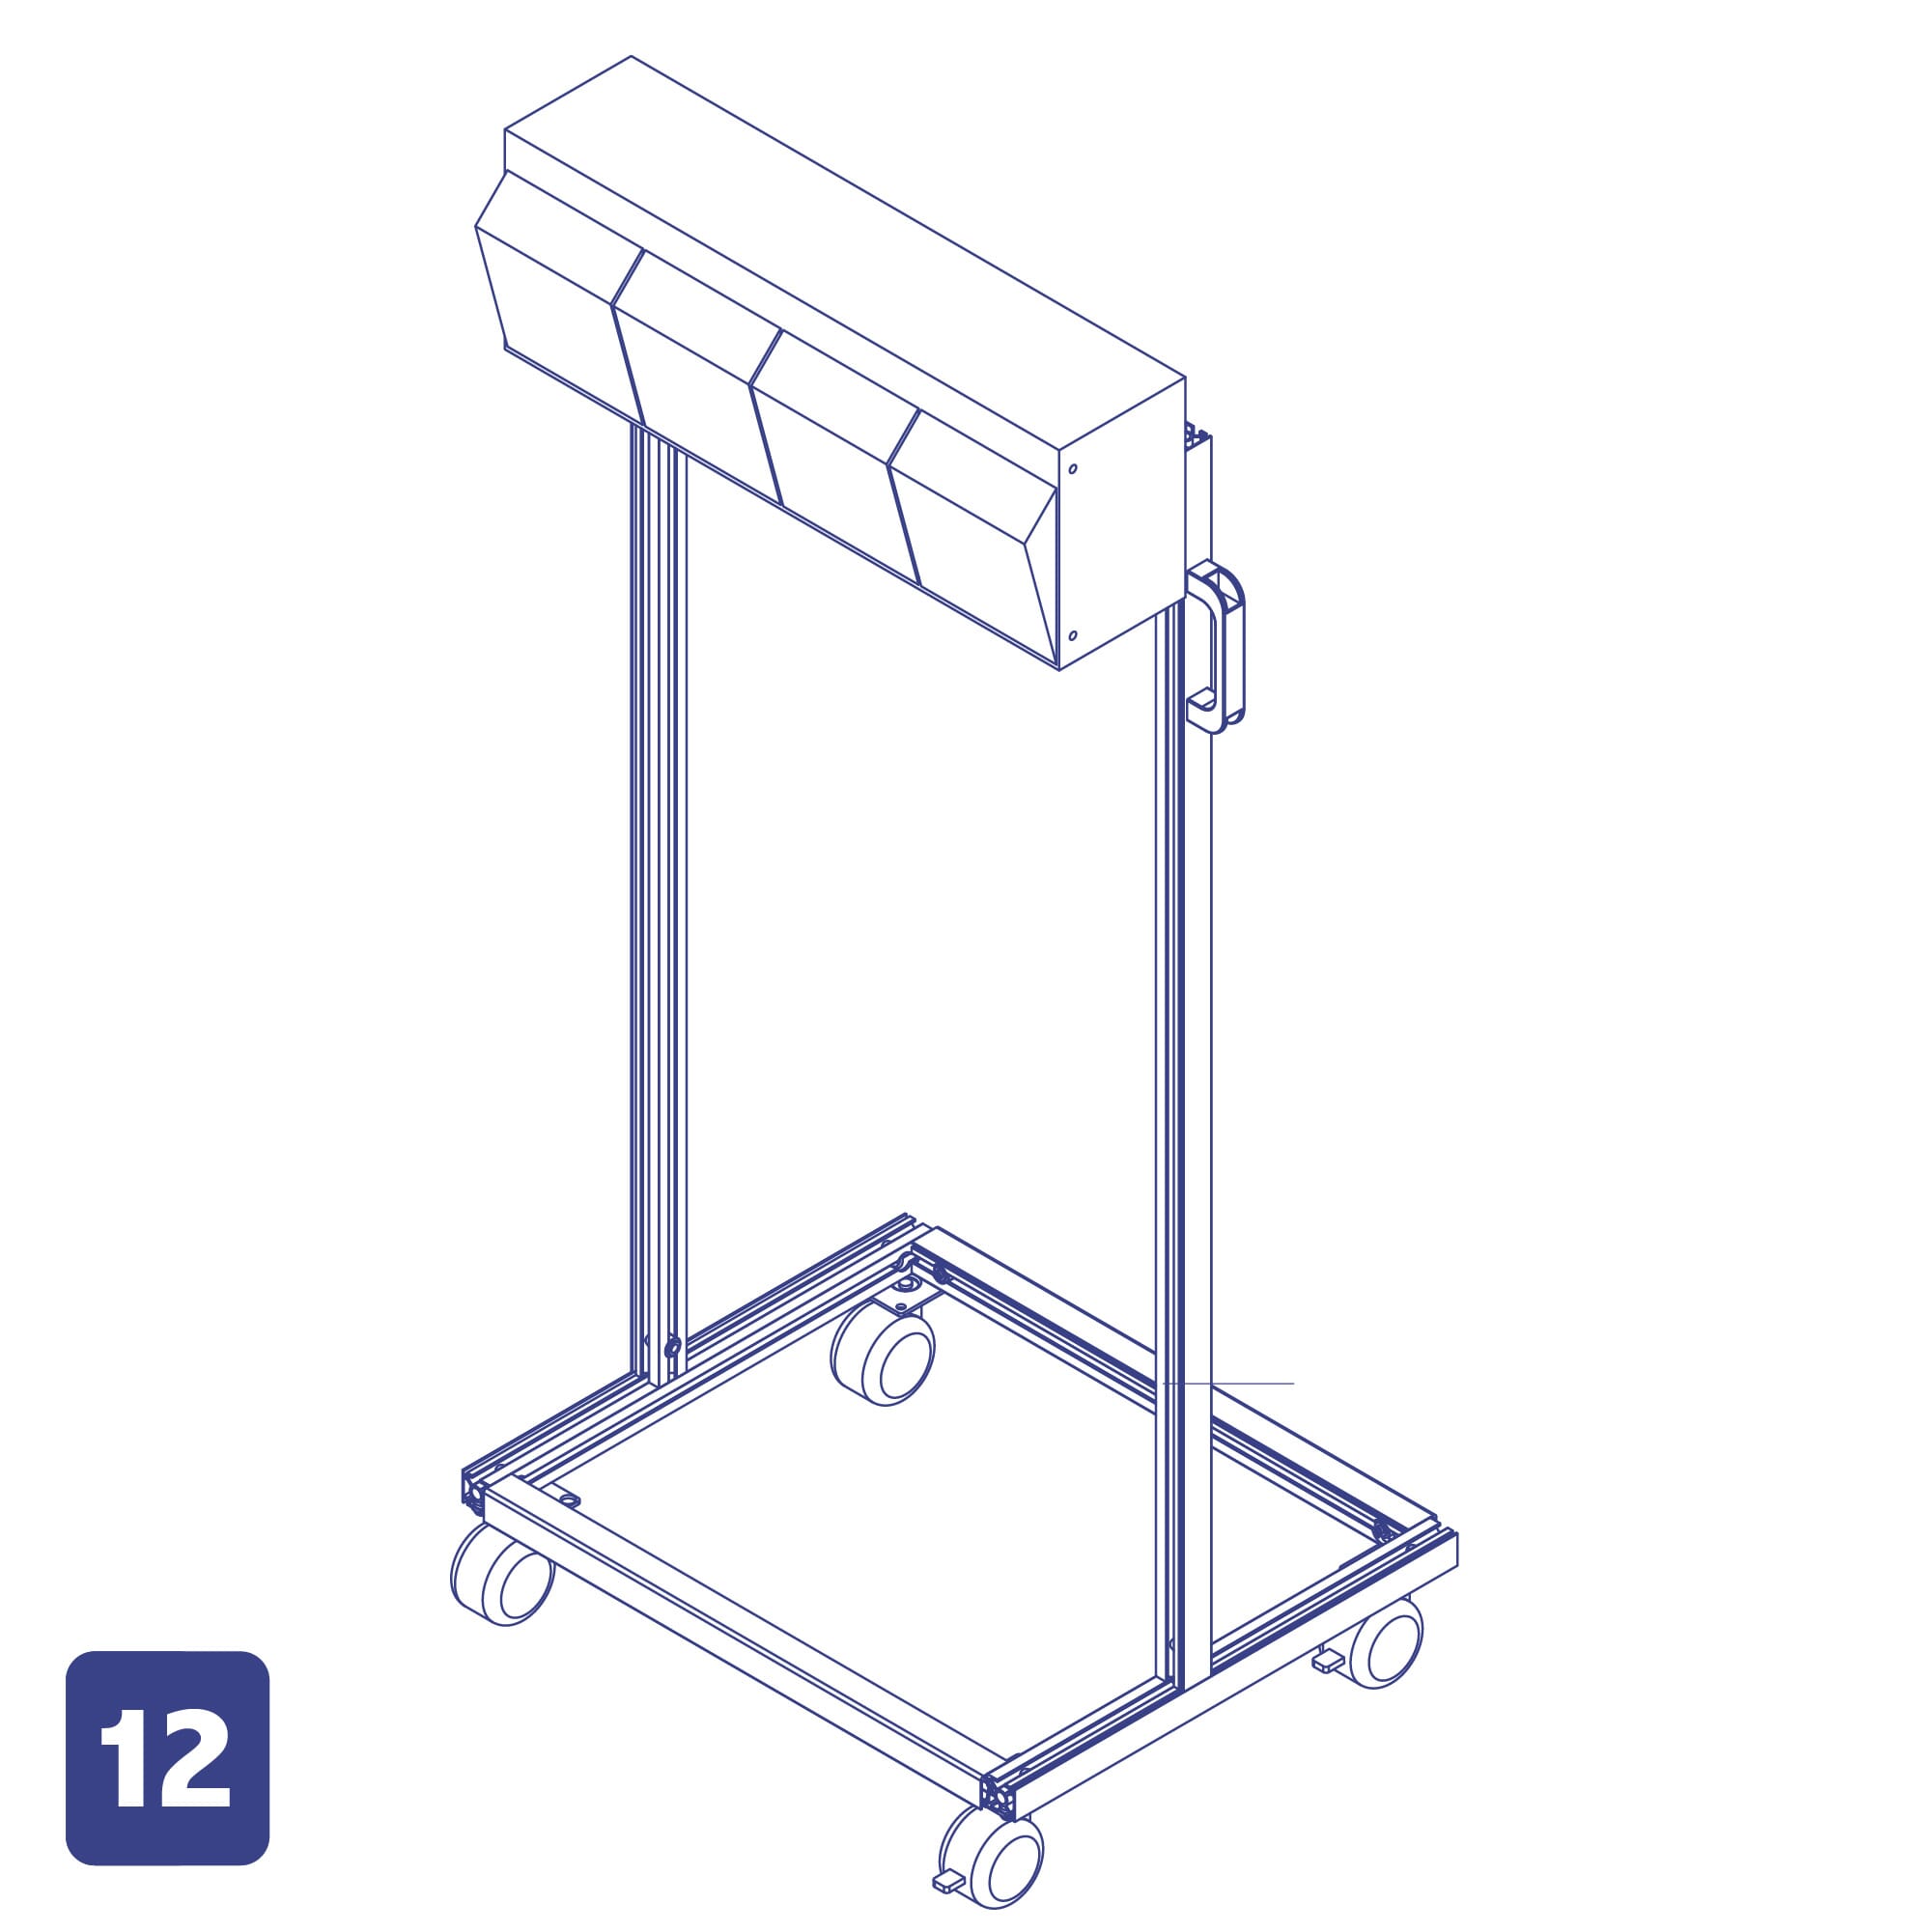
- Insert the blue buttons into the tilt bins.
- Insert your tilt bins by sliding the bins into the upper horizontal rail tracks.
Step 13:
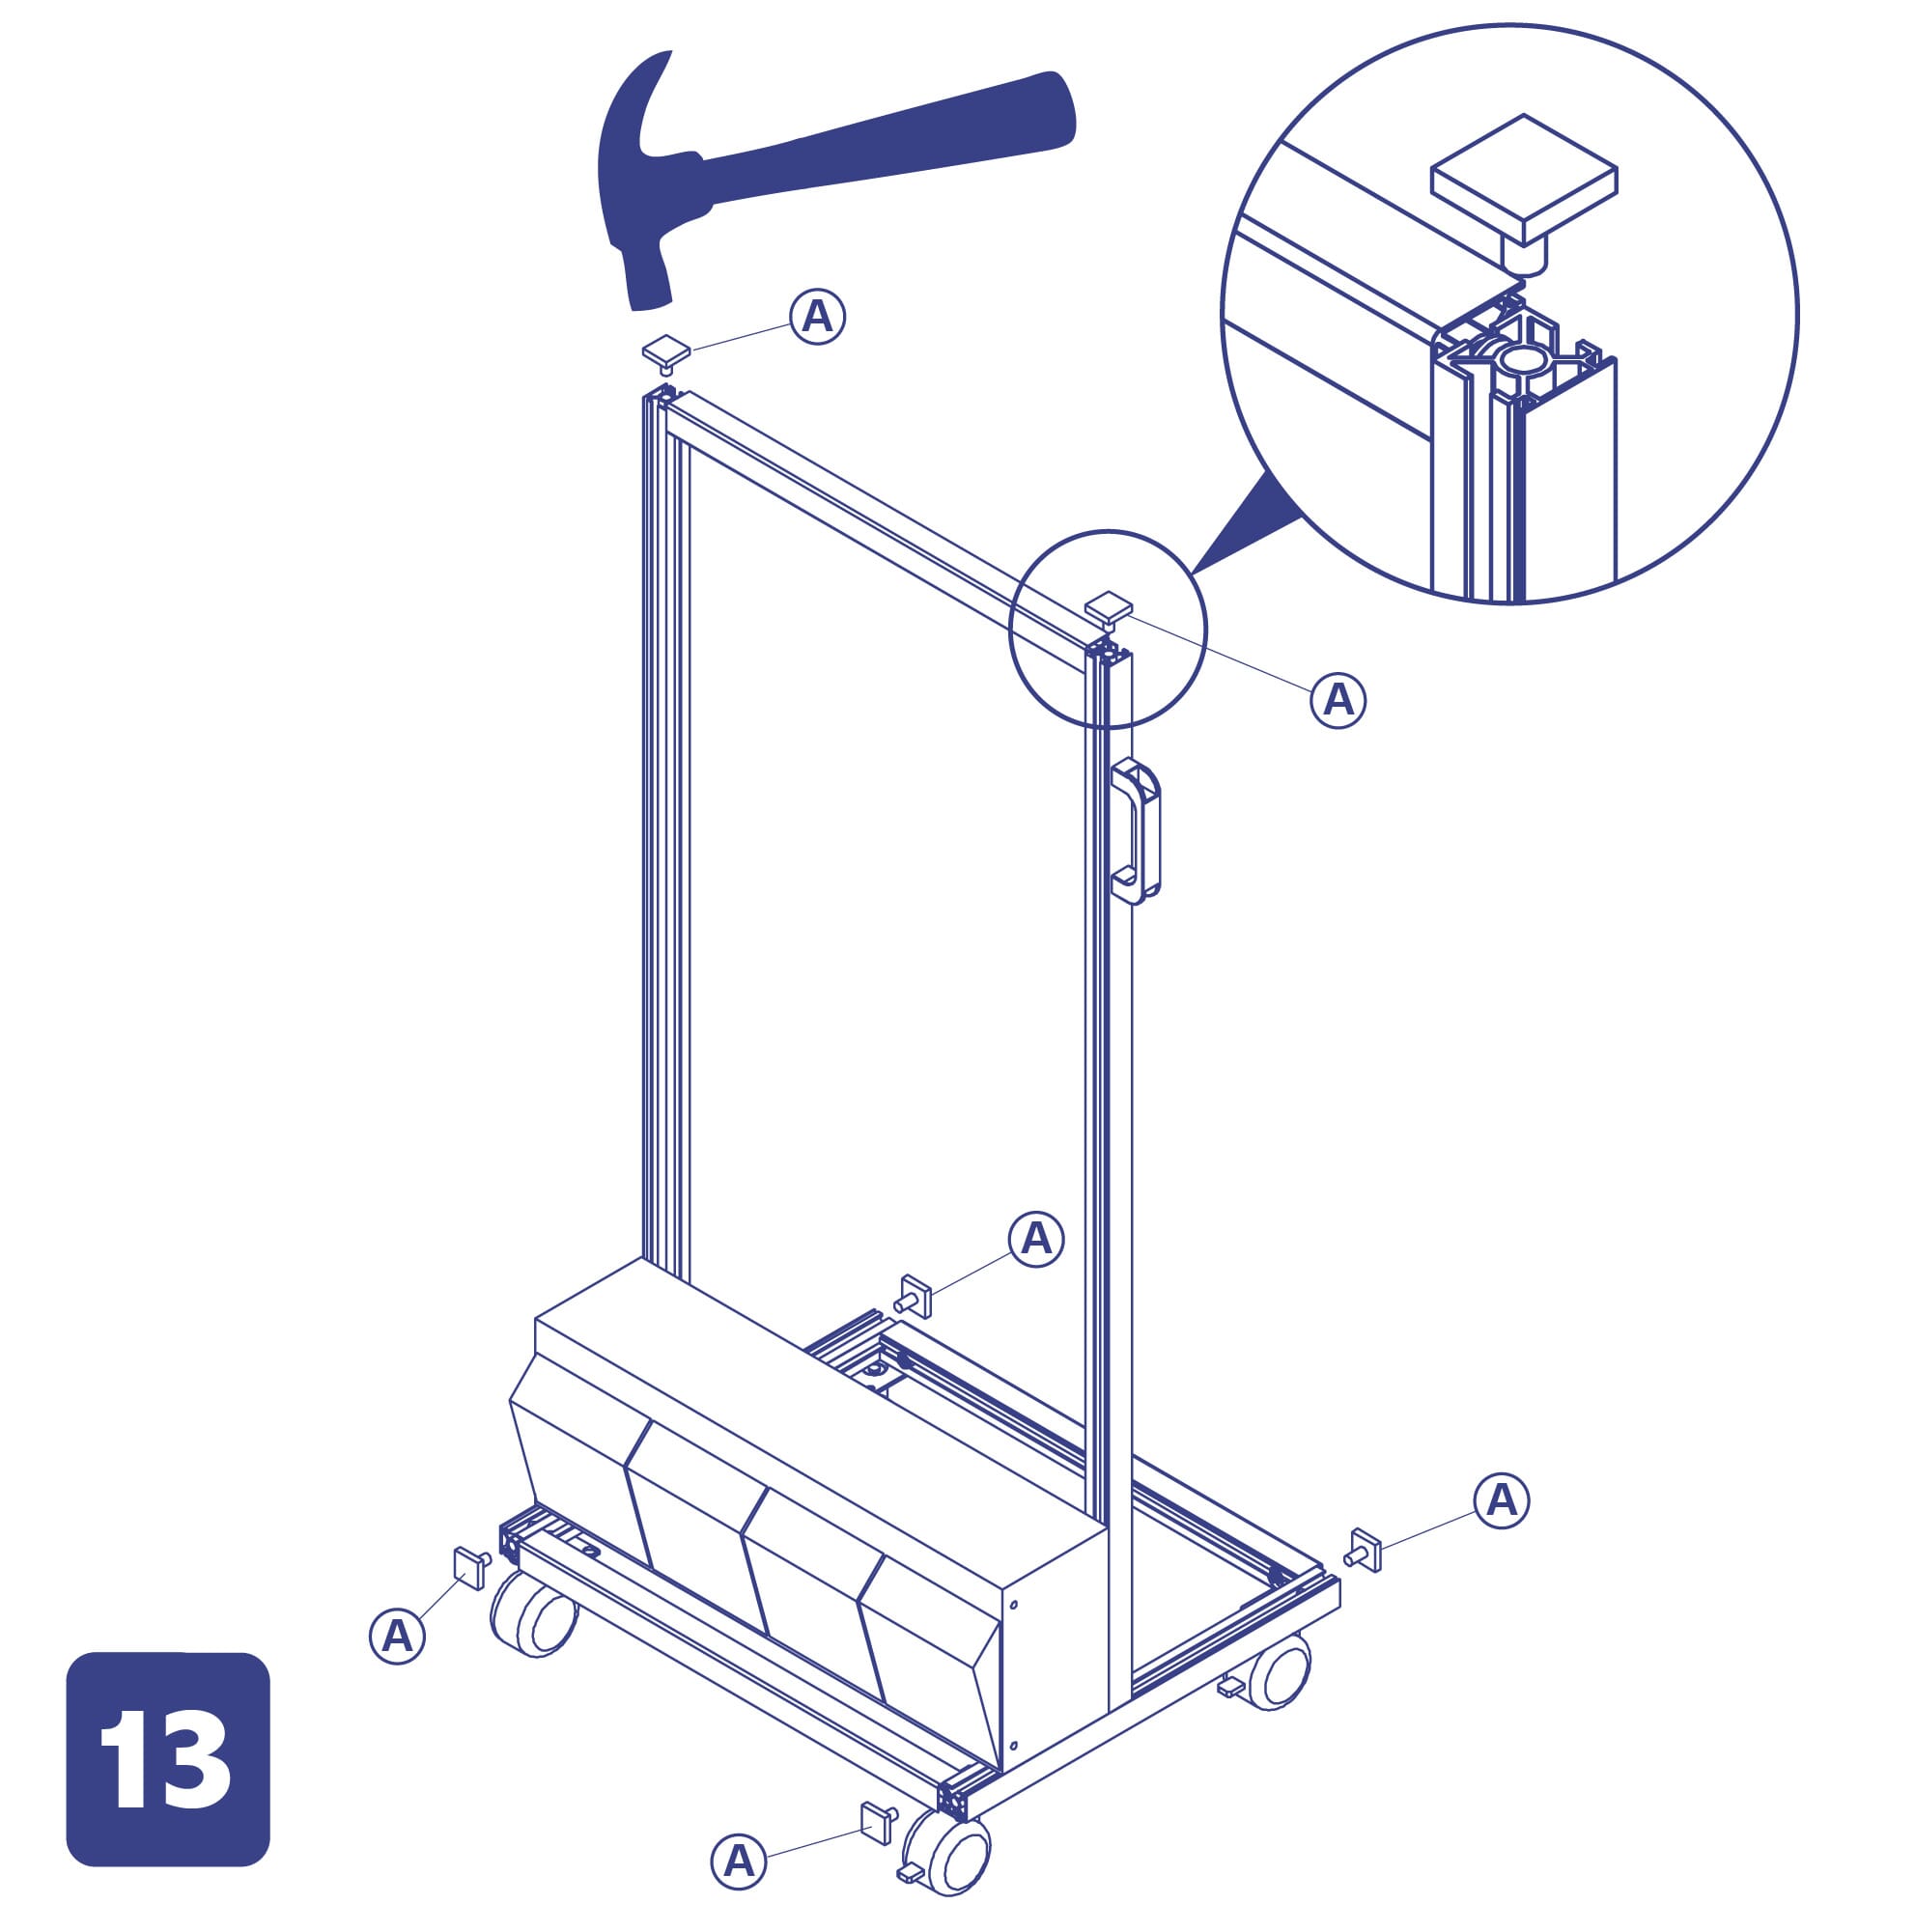
- Take 4 parts A.
- Install them at the open extremities of parts B, C, and J.
Now you are all set!